Now that you’ve connected Sitecore to your microsite or external website you can now tell Sitecore what pages to track, and how, by setting up page filters and configuring events, goals and personalization for the non-Sitecore website pages.
Personalization works identically for regular Sitecore pages, and non-Sitecore pages (external websites), through the Experience Editor.
The only difference is that for non-Sitecore pages, the Experience Editor must be launched from within the FXM using the “Open in Experience Editor” button.
Once inside the FXM Experience Editor, you will immediately notice that there are several new buttons available to you.
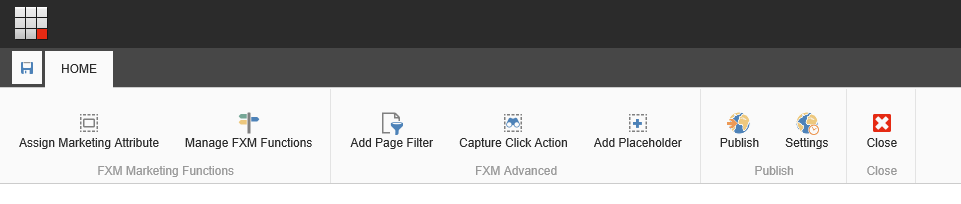
- Assign Marketing Attribute – shows you which elements on the page have already been configured with FXM
- Manage FXM Functions – this button allows you to manage all the configurations (placeholders and actions) that you have added to the page in one place
- Add Page Filter – to add personas, goals or events at a page-level or for all descendant pages you use this features
- Capture Click Action – pretty self-explanatory; you can record and track when someone clicks on an element on the page
- Add Placeholder – this is a powerful function that enables you to add Sitecore content and/or components to your non-Sitecore pages…all personalization functions apply
- The buttons for each feature work as “toggles”; in that you turn them on and off when you’re ready to use them. So, if you see that the buttons are all greyed out, except one, simply click the active button to turn it off and all the other buttons should become available.
Now that you have a general overview of the FXM Experience Editor, let’s get to the meat of this post…How to Track Clicks with Sitecore FXM.
Simple Scenario:
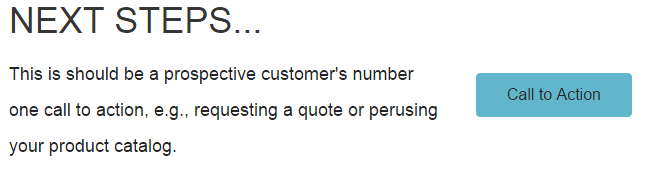
We are running a subscription campaign that drives people to our non-Sitecore website and we want to know how many people click on our CALL TO ACTION button that is at the bottom of the home page.
Here are the steps:
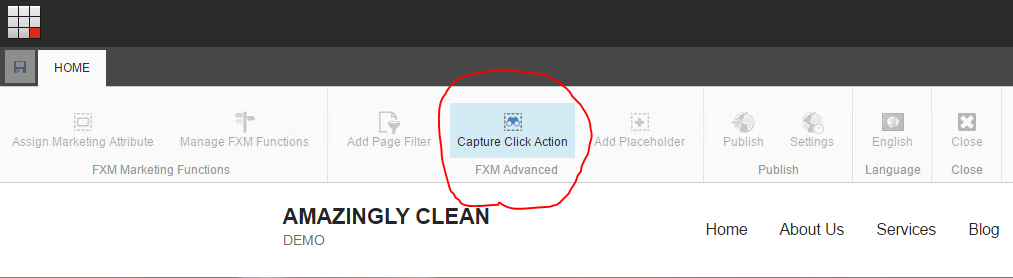
- With the FXM Experience Editor open, navigate to the page that contains the item you want to track. In our example, the CALL TO ACTION button is on the home page.
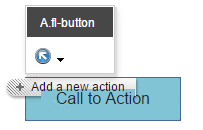
- Click the Capture Click Action to activate it, which simultaneously deactivates the other buttons.
- Click the object you want to track. In our case, the Call to Action button.
- From to pop-up toolbar, click on the Add a new action button to open the Capture Click Action dialogue box.
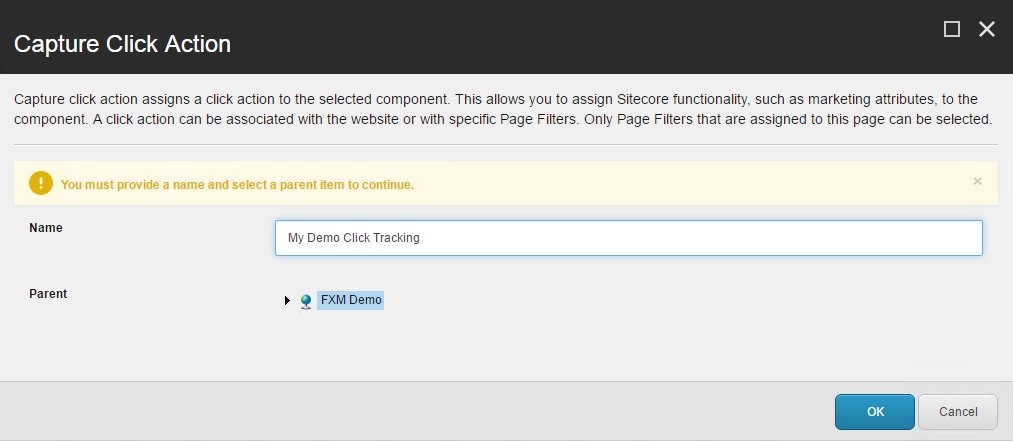
- In the Capture Click Action dialogue box you will be asked to provide a component Name and specify a Parent for Sitecore to store the content item (component) that will handle the tracking and Sitecore functionality within the non-Sitecore site.
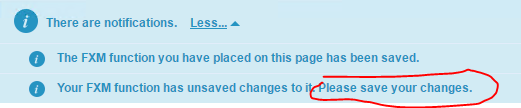
- Click OK and you will see an alert/notification stating the FXM function has been saved.
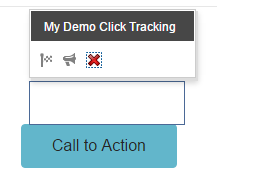
You will also see that the pop-up toolbar now contains the name of your Action.
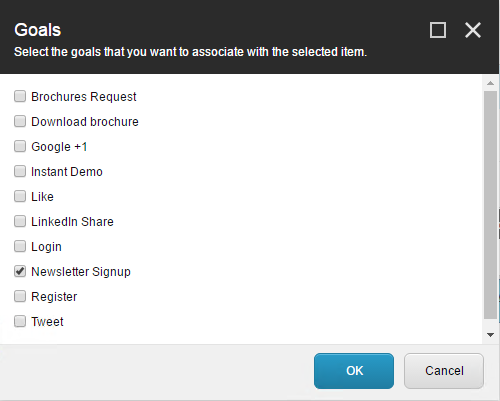
- From the new pop-up toolbar, you have the option to Assign a Goal or Analytics Attribute. We’ll assign the goal of Newsletter Sign-up (it’s not a sign-up form, but let’s pretend).

That’s it! Seven simple steps to tracking clicks from a non-Sitecore website with Sitecore Federated Experience Manager (FXM).
P.S. Always remember to save and if you want to see the details of the object you created you can find it in the Marketing Control Center.