Getting into JSS, Part 1: React
As we discovered during this year’s Sitecore Symposium, JSS is going to be central to the world of Sitecore and Sitecore development. While interesting and exciting, new programming paradigms can take a while to learn. It feels like just yesterday we were switching from .Net web forms to MVC. And MVC is great! Why change things?
For one, modern Javascript frameworks are a lot faster - the server simply needs to provide a package of data instead of rendering the whole page. Then, the browser can come in and do the work of actually rendering the page. It’s not hard to imagine how the benefits of shifting from server to browser rendering scale.
However, like MVC before it, JSS is a completely different way of doing Sitecore development. Sure, the underlying concepts on the Sitecore side are the same (information architecture through Templates, page rendering through the Layout engine), but the logic and markup are completely different.
In this series of blog posts I intend to walk you, the aspiring JSS developer, through the basics of developing JSS solutions with the React framework. By the end you should have a component written with JSS and imported into your Sitecore solution. While I’ll be relying heavily on Sitecore’s JSS documentation, I’m also going to cover the basics of React development. So let’s get started.
Basic React Development
We’ll start with what’s new and foreign: React. While React is only one of the frameworks supported by JSS (the others being Vue and Angular), it’s certainly the most popular.
With React, you need to unlearn everything you think you know about Javascript development. React development isn’t anything like using Jquery, in which you operate on an already-rendered DOM. React itself renders the DOM, then re-renders parts of it whenever something needs to change, move, or do anything else you might do with Javascript. It does so through the use of components.
Sitecore devs will already be familiar with the concept of components, and that basic understanding carries over to React/JSS. Components take in data and output markup. In React, a component is a javascript function that returns markup.
There are a couple of ways to declare components: function components, and component classes.
Function components look like this (stolen from reactpatterns.com, which I HIGHLY recommend you read and experiment with all the way through):
function Greeting(props) {
  return <div>Hi {props.name}!</div>;
}
Though the following syntax is probably more common for small components:
const Greeting = (props) => (
	<div>Hi {props.name}!</div>
);
The easy way to remember how this works is to think of the => as being equivalent to “return”.
Meanwhile, component classes are declared like this:
class Greeting extends React.Component {
  constructor() {
    super();
  }

  render() {
    return <div>Hi {props.name}!</div>;
  }
}
Component classes are more complex and can be assigned a state, which is important for manipulating data through the DOM.
The syntax for rendering any of these is the same:
<Greeting name="Will" />Pre-compiled react elements like this make up what is called the “virtual DOM.” You can inspect any given website’s virtual DOM by using the React Developer Tools extension, which shows you what data is being sent to each component through the use of “props.” In the above example, the Greeting component accepts a single prop, called “name.”
The virtual DOM is then compiled by a JSX compiler. What’s JSX? JSX is the syntax that allows Javascript and HTML markup to be written together. React doesn’t compile this syntax out of the box, which means you need to use a compiler like babel-core. The compiled output for this component would be thus:
<div>Hi Will!</div>This is the most basic thing to understand about react: components accept props and render the DOM. In addition to ReactPhttp:atterns.com, I highly, highly recommend you walk through the official introductory tutorial, which explains things like how JS functions can be sent through props to child components.
React Development with VS Code
Now we’re going to create a simple “Hello World” page. However, we’re going to do it the fun way, playing with a new toy. The new toy is a free IDE called Visual Studio Code. VS Code is an incredibly lightweight IDE that is very extensible and is perfect for quick web development. Go ahead and get that installed, and make sure to integrate it into the shell.
After installing, create a folder in your file structure and call it something like “react dev.” Right-click this folder and click “Open with Code.” The IDE will open with your folder in the “explorer” window on the left (VS Code shows you the naked file structure rather than merely representing it like enterprise VS does).
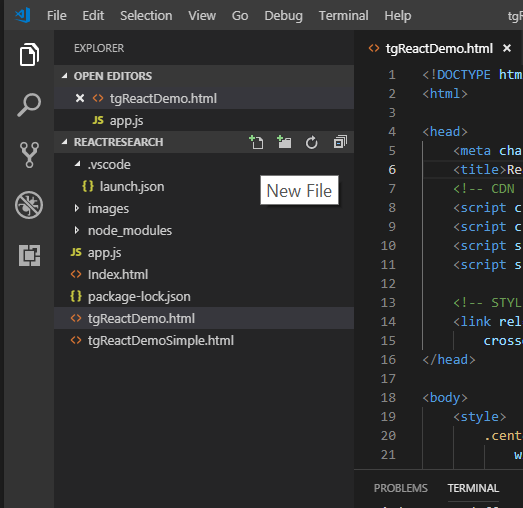
You can hover over your folder heading and create a new file by clicking the “new file” button. Do that, calling your new file “TGHelloWorld.html”. Press Enter and you should now have your blank file open in the main editor window. Copy the following boilerplate HTML code into it and save you some time:
<!DOCTYPE html>
<html>
<head>
   <meta charset="UTF-8">
   <title>React Demo for TechGuilds</title>
</head>
<body>
	<style></style>
	<script type=”text/babel”></script>
</body>
</html>
If you save and then open this file in a browser, you shouldn’t see anything except the title being reflected in the tab. So let’s change that.
In your <body> tag, add the following line:
<div id="anchor-div"></div>This div is the placeholder that react will use to render the DOM. Next, we’ll actually import react so we can use it. Since we’re writing everything in the one .html file, we’ll just use react’s CDN links. Put the following inside the <head> tag, after <title>:
<script crossorigin src="https://unpkg.com/react@16/umd/react.development.js"></script>
<script crossorigin src="https://unpkg.com/react-dom@16/umd/react-dom.development.js"></script>
We can’t develop in react yet though. We also need to import the JSX compiler mentioned earlier. Do so with the following line:
<script src="https://cdnjs.cloudflare.com/ajax/libs/babel-core/5.8.23/browser.js"></script>Perfect. Now we’re ready to write some react code. First, add a “type” attribute to the <script> tag in the <body> and set it equal to “text/babel.” Then, add the following code for our first component inside the <script> tag:
const HelloWorld = (props) => (
           <p>Hello, world!</p>
       );
Finally, to make it all work, add the following ReactDOM render statement right before the closing </script> tag:
ReactDOM.render(<HelloWorld/>, document.getElementById('anchor-div'));Now, open up your TGHelloWorld.html in a browser and you should see the text “Hello, world!”. Congrats, you’re a react developer!
Let’s do one more thing here to make our component a bit more dynamic. Currently we don’t have any props being passed through HelloWorld, making this a pretty poor example of the power of react. So let’s change the component code to accept some props. Here we’ll be using a powerful technique called “spreading props.” It looks like this:
const HelloWorld = ({...props}) => (
           <p {...props}>Hello, world!</p>
       );
What does this do, you ask? Well, to put it simply, <HelloWorld/> simply passes along all of its props/attributes to its rendered <p> tag. So if you write <HelloWorld id=”test-id” />, it will render <p id=”test-id”>Hello, world!</p>.
Let’s go one step further:
const HelloWorld = ({...props}) => (
           <p {...props}>Hello, {props.name}!</p>
       );
In addition to whatever attributes you want to pass to the <p> tag, this will also output the value of a specific prop, namely “name”. So if you want your output to say “Hello, Will!”, the render syntax would be:
ReactDOM.render(<HelloWorld name="Will"/>, document.getElementById('anchor-div'));To Be Continued...
I hope this post was informative in breaking down the basics of React development. I've covered the basics here, but to get comfortable with it I suggest you look at the official React documentation, as well as ReactPatterns.com.
In my next post, I'm going to talk about utilizing React libraries to make more powerful solutions. Specifically, we're going to use React-Bootstrap to create a Carousel component that we'll later import into Sitecore.
As always, please leave a comment if you have any questions, suggestions, or clarifications you'd like to share.