Sitecore’s Layout engine is one of its greatest strengths, as this system is independent but interconnected with its data modelling features. Sitecore Layouts, Sub-Layouts and Renderings are essential and foundational parts of your Sitecore implementation and act as the canvas for your website. The layout engine ties together every part of your solution and is the forward-facing part of your site.
Layouts
Layouts are the scaffolding for your web pages, and will usually include the <head> and <body> tags for the markup. They often pull in styling and javascript code but have little markup themselves, instead having multiple placeholders in which one can plug component renderings.
There are a few ways to create a new layout in Sitecore. The first way would be inside the instance. Simply navigate to the content editor, then to the Layout section. Expand this section and open the “Layouts” section inside. Create or navigate to a folder here, and right-click the folder to add a new Layout item. You’ll need to provide a path to a corresponding razor view (.cshtml) file, which you should create in a project somewhere in your solution.
To create a new layout through Sitecore Rocks, right-click a "layouts" folder in your visual studio project (in the VS solution explorer, NOT the Sitecore Explorer) and choose Add -> New item... -> Sitecore -> Layouts -> Layout. If the layout is created successfully and if your project is correctly connected to the Sitecore instance, Sitecore Rocks will ask you to create an item in the Sitecore Content Tree. Add the layout item in the Layouts folder (sitecore/layout/Layouts). This process will also automatically create a view file to link to the layout item.
If you do encounter an error when creating a layout, please refer to our "Error when creating a Layout - TemplateWizard" article.
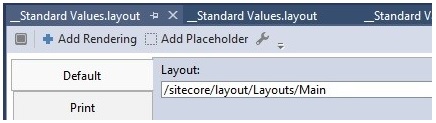
Now that the layout is created, it can be used to display content. Layouts don’t have code-behinds with the ability to execute business logic, which is what renderings are for. However, any item in your content tree can be given a corresponding layout, and that layout can display that item’s information through the use of fieldrenderers (like @Html.Sitecore().Fields(“title”)). You can also make it so that certain layouts come standard on certain types of items. You can assign a layout to a template by navigating to the template's standard values item, right-clicking on it and clicking Tasks -> Design Layout. In the layout field, click browse and choose your layout.
The layout is now assigned to the template by default and will apply to any item that is created using the template.
Sublayouts
In older Web Forms implementations of Sitecore, components are created using .ascx sublayout files. They act as movable, reusable components that can also be nested inside placeholders.
Creating a sub layout is not very different from creating a layout. To create a new sub layout, right-click your layouts folder in your visual studio project (in the VS solution explorer, NOT the Sitecore Explorer) and choose Add -> New item... -> Sitecore -> Renderings -> Sublayout. Same as before, If the sub layout is created successfully and if your project is correctly connected to the Sitecore instance, Sitecore Rocks will ask you to create an item in the Sitecore Content Tree. Add the sub layout item in the Sublayouts folder (sitecore/layout/Sublayouts).
Renderings
In modern implementations of Sitecore, components are created using .Net MVC. Like sub-layouts, renderings are represented in the content tree by an item under the Layouts node (specifically, Layout/Renderings). There are two types of renderings: controller renderings and view renderings. View rendering items are the simpler type, and like Layout items consist mainly of a field with a path to a .cshtml view file. Controller renderings, on the other hand, allow you to utilize the model-view-controller pipeline (in our case more like controller-model-view) in order to use business logic for components.
To create either kind of rendering, you can do so in the content editor by right-clicking a folder in Layout/Renderings and adding a new rendering of your choice. You can add renderings through Sitecore Rocks by right-clicking a folder in your project and selecting add-> New Item -> Sitecore -> Renderings -> Controller/View Rendering.
Placeholder
Placeholders are Sitecore controls that are used in layouts and sub layouts and are used to define where components can dynamically be bound. The key attribute identifies the placeholder. A typical placeholder looks like this:
Web Forms:
<sc:placeholder key="maincontent" runat="server" />
</div>
MVC:
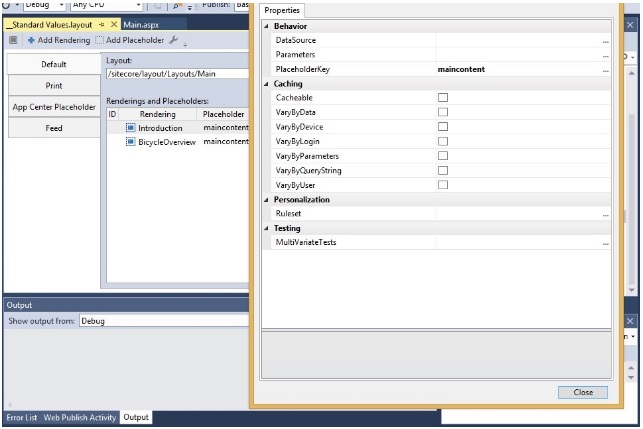
@Html.Sitecore().Placeholder("maincontent")Insert the placeholder in the layout you created earlier. We can now bound our sub layout to it. Navigate to the template's standard values item (the same template you assigned your layout to), right-click on it and click Tasks -> Design Layout. In the Design layout page, click on Add Rendering. Search for your sub layout, select it, and click OK.
Now that the sub layout is added, we need to bind it to our placeholder. To do so, double click on the rendering to open the Edit Rendering Properties. Under behavior, click on the … next to PlaceholderKey and choose the key that identifies your placeholder. When you are done, it should look something like this: