Sitecore is a powerful platform. Sometimes, with this power comes a bit of lag in using it to its fullest potential. This post is part of a series that aims to help marketers get familiar with some of Sitecore’s marketing features and get you (if you’re one) well on your way to be a power marketing user. The feature we’re discussing in this post is Sitecore Marketing Automation.
But first things first…
What is marketing automation
As the name suggests, marketing automation is the automation of some marketing activities. Normally, these are the activities that aim to convert website traffic into leads and close these leads into customers by sending them relevant and personalized content at the right time (e.g., information they need when they need it based on their behaviour). This is done by using marketing automation software. It is a piece of the digital marketing puzzle that brands rely on to generate more revenue.
What is Sitecore Marketing Automation
Sitecore Marketing Automation is an application from Sitecore that allows users to create marketing automation campaigns through a user-friendly drag-and-drop interface. It is one of Sitecore’s Marketing Applications, and it is available out of the box with Sitecore XP versions 9.0 and above.
A walk through Sitecore Marketing Automation
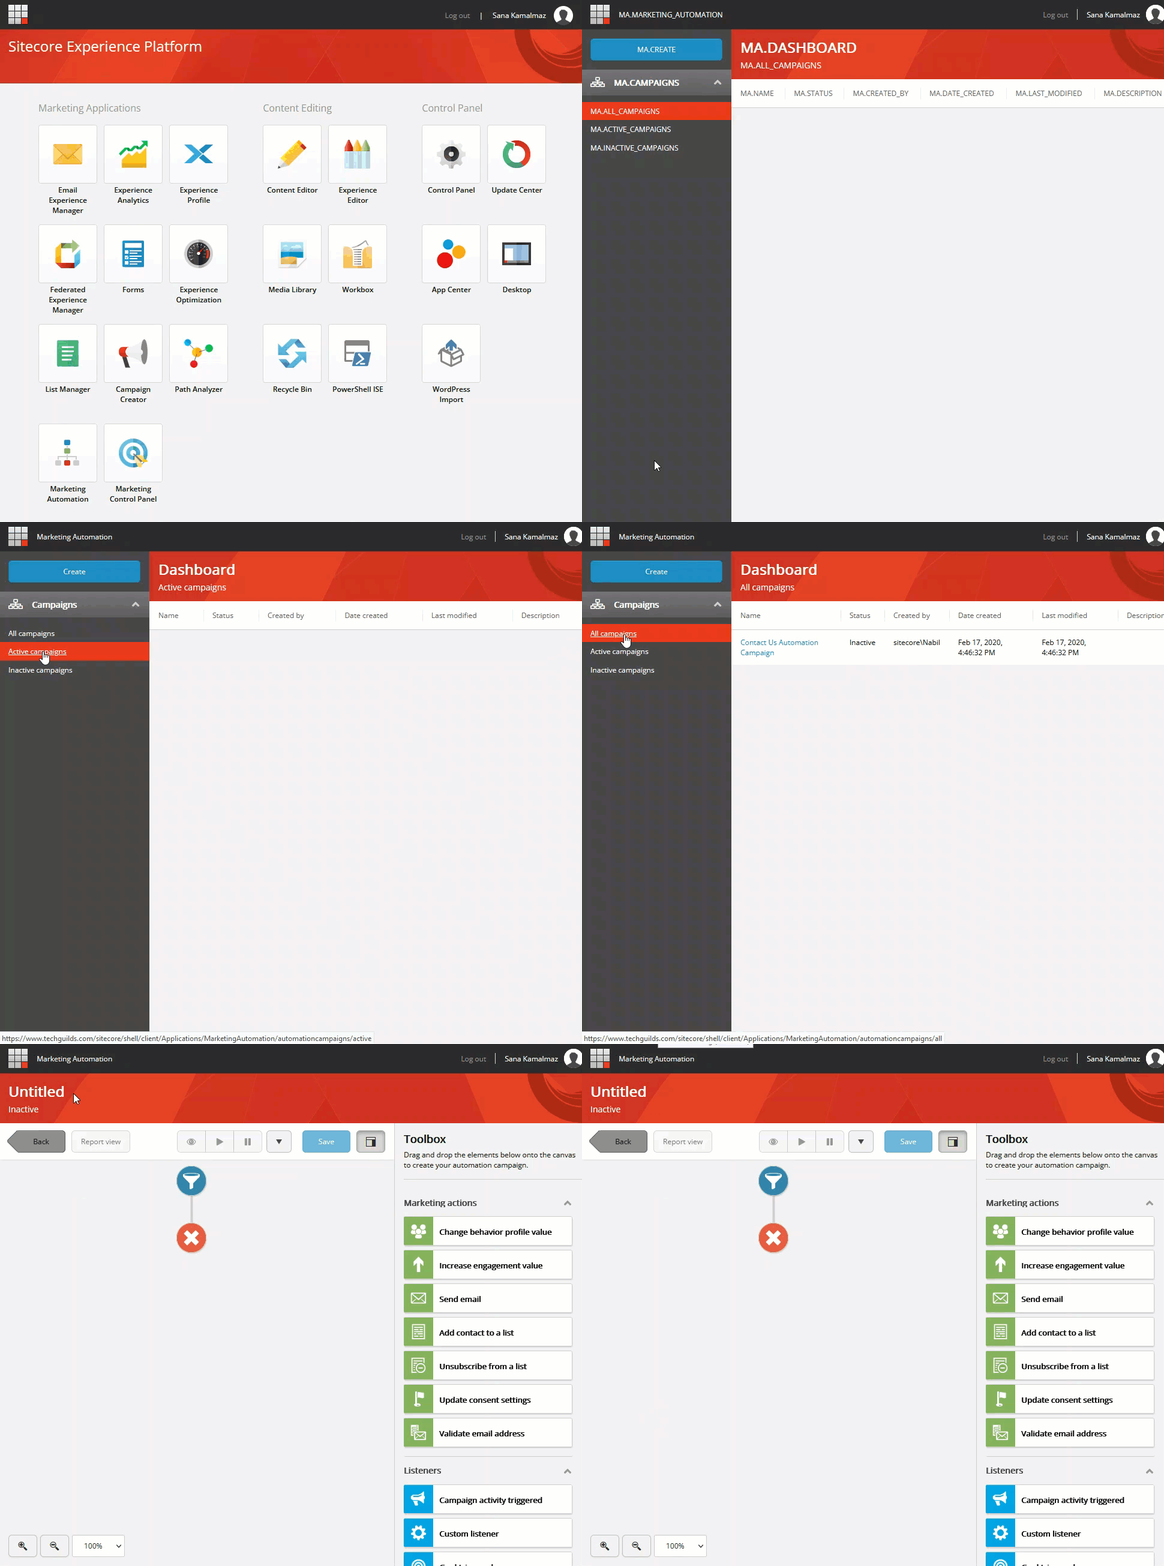
- To access Sitecore Marketing Automation, in Sitecore Launchpad, under Marketing Applications, click Marketing Automation
- Once there, you’ll see the Marketing Automation dashboard on the right and a pane on the left where you can
- create a new automation campaign
- filter existing campaigns by active, inactive, or other filters if you had set any up
- To create a new campaign, click the create button
- In the new campaign window, you’ll see the canvas and to the right of it, the toolbox
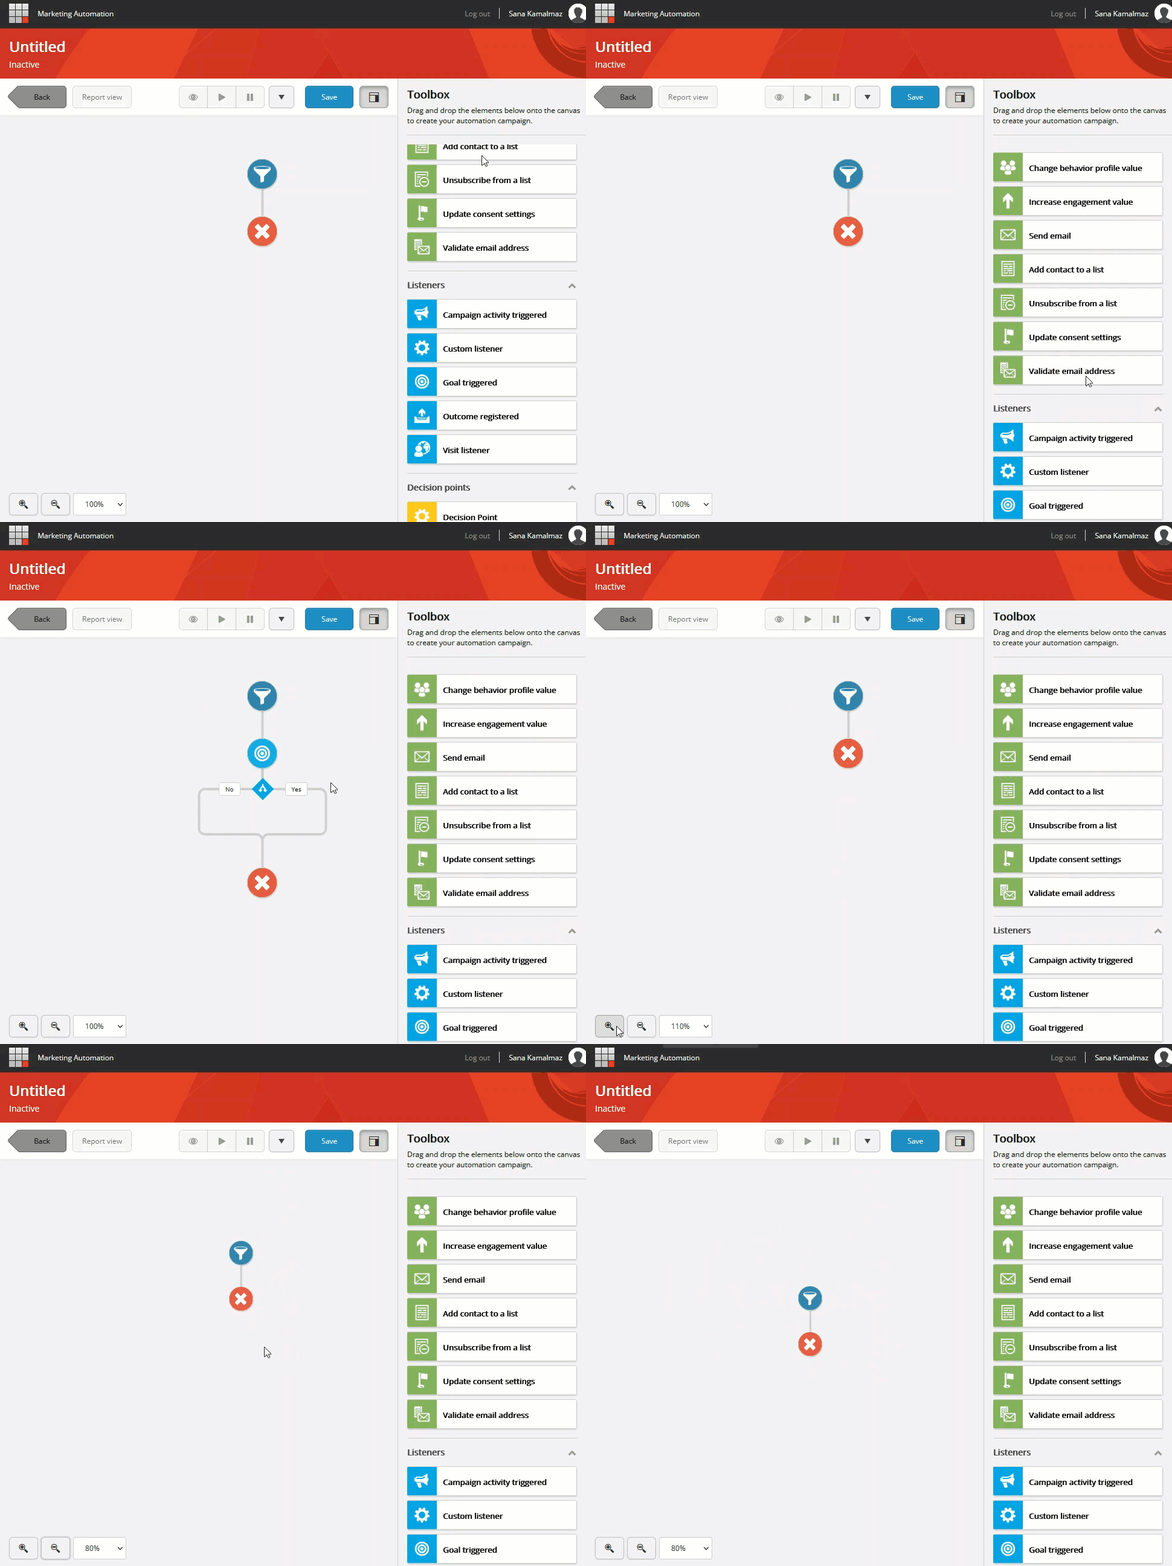
- You can drag and drop elements from the toolbox to the canvas to build your campaign. When you drag an element onto the canvas, the green circles on the paths indicate where in the campaign you can drop the element. Once you’ve added an element to the canvas, you can click on it to specify its details. Each element represents a step in your campaign. When contacts are enrolled in the campaign, they go through the flow of steps/elements that you have defined. We’ll discuss the elements further below
- At the bottom-left corner is the zoom in and out control. You can also zoom in and out using the scroll wheel, and you can pan using the left mouse key
Elements of marketing automation campaigns
Sitecore calls the building blocks that you can use to build your automation campaign elements, and it categorizes them into:
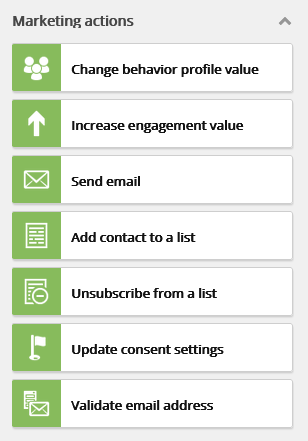
- Marketing actions – you can use these to perform marketing actions or to make changes to the information that is stored about contacts in the database. Some of the marketing actions that are available by default are:
- Change behavior profile value – changes the behavior profile value for contacts that reach that element
- Increase engagement value – increases engagement value of contacts that reach that element
- Send email – sends an email to contacts that reach that element
- Add contact to a list - adds the contacts that reach this element to one or more contact lists
- Unsubscribe from a list - removes the contacts that reach this element from one or more contact lists
- Update consent settings - changes the consent settings for contacts who reach this element
- Validate email address - marks the email addresses of contacts that reach this element as valid
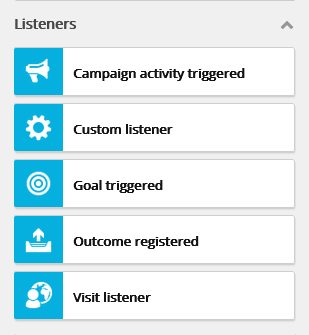
- Listeners – you can use these elements to listen for specific actions made by contacts in a specific period to identify how each contact should proceed through the automation campaign. From there, a contact can proceed along a Yes path or a No path depending on whether they meet the specified conditions in the rule within the specified period. Some of the listeners that are available by default are:
- Campaign activity triggered - checks if the contact that reaches this element triggers one or more campaigns. If they do, they move along the Yes path
- Custom listener - checks if the contact that reaches this element meets the conditions you set in the rule set editor within the specified period and then sends them along the Yes path or No path accordingly
- Goal triggered - checks if the contact that reaches this element triggers one or more goals. If they do, they move along the Yes path
- Outcome registered - checks if the contact that reaches this element registers one or more outcomes. If they do, they move along the Yes path
- Visit listener - checks if the contact that reaches this element visits your website after they enrolled in the campaign. If they do, they move along the Yes path
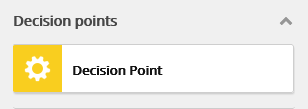
- Decision points – you can use a decision point element to evaluate whether the contacts that reach that point satisfy a rule you specify and determine the path that they should continue along accordingly. Decision points are different from listeners in the sense that they don’t wait for a period of time to see if the contact takes an action. Rather they check instantaneously without delay
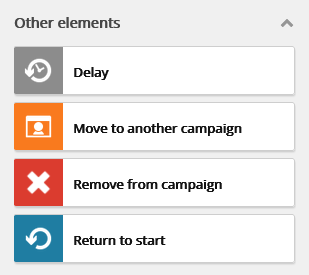
- Other elements – you can use these elements either to pause a contact's movement through the campaign or to move a contact to the beginning of the campaign or to another campaign
- Delay - delays the contact's further movement through the campaign for a specific period of time or until a specific date and time
- Move to another campaign - enrolls the contacts that reach this element to another automation campaign
- Remove from campaign - removes the contacts that reach this element from the automation campaign
- Return to start - moves the contacts that reach this element in the automation campaign to the beginning of the campaign so that they can go through it again
I hope this quick overview was helpful. If it was, keep an eye out for the next post where I’ll walk through a sample scenario and create a marketing automation campaign using SItecore step by step.

