In previous posts in our Sitecore Agile Context Marketing Mini-series, we created a webinar registration landing page and added a Sitecore form. We also created goals that get triggered based on the actions users take on the landing page. In this post, we’ll walk through how to use these goals to show personalized callouts throughout the website to maximize registration.
Before we begin, however, let’s address this hypothetical, yet important question: “Why though?”
Well, good question. Not all interested users will convert and register on their first visit to your registration page. There will be users who leave the page to look around your website and learn more about you. It’s a good idea to get those back to the registration page, especially when you have the technology that allows it: Rules-based personalization in Sitecore.
So how is it done?
To show how rules-based personalization is done, we’ll use this simple scenario: for those users who land on the webinar registration page but do not register, we’ll show a callout on the homepage to remind them that they haven’t registered. We’ll be using the Sitecore Habitat demo site. Although different, your Sitecore build is likely to have a component that can be used as a callout.
First: Identify and navigate to the component you wish to personalize
- Log in to Sitecore and click on Experience Editor
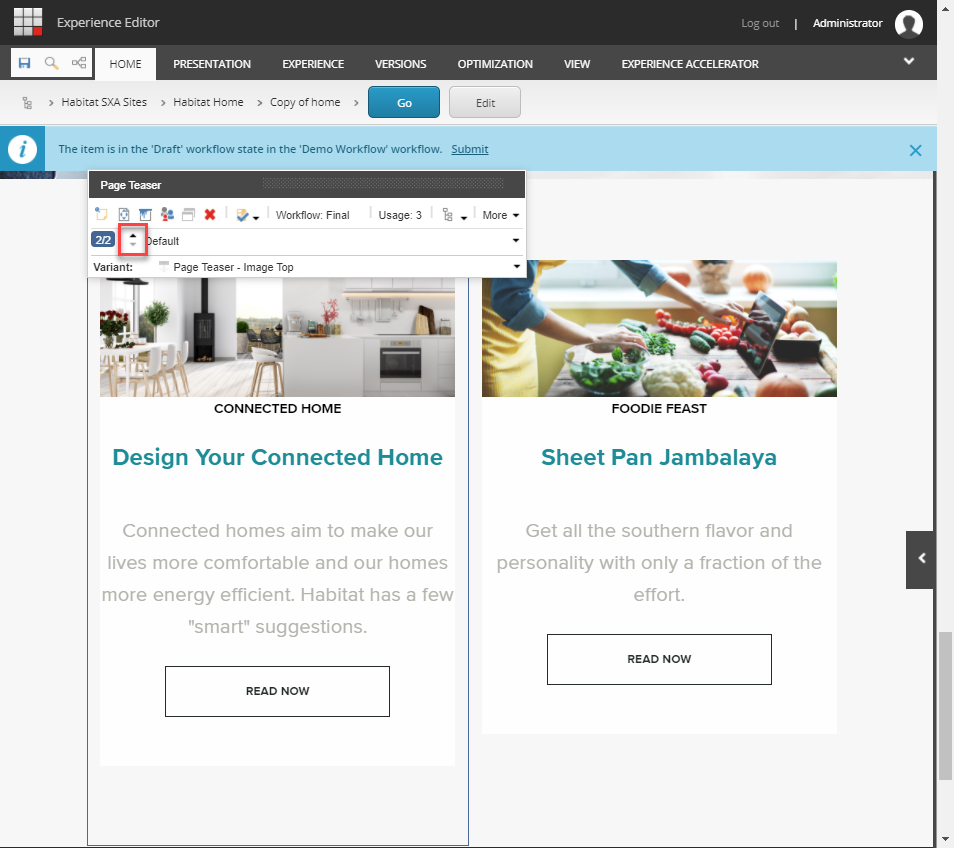
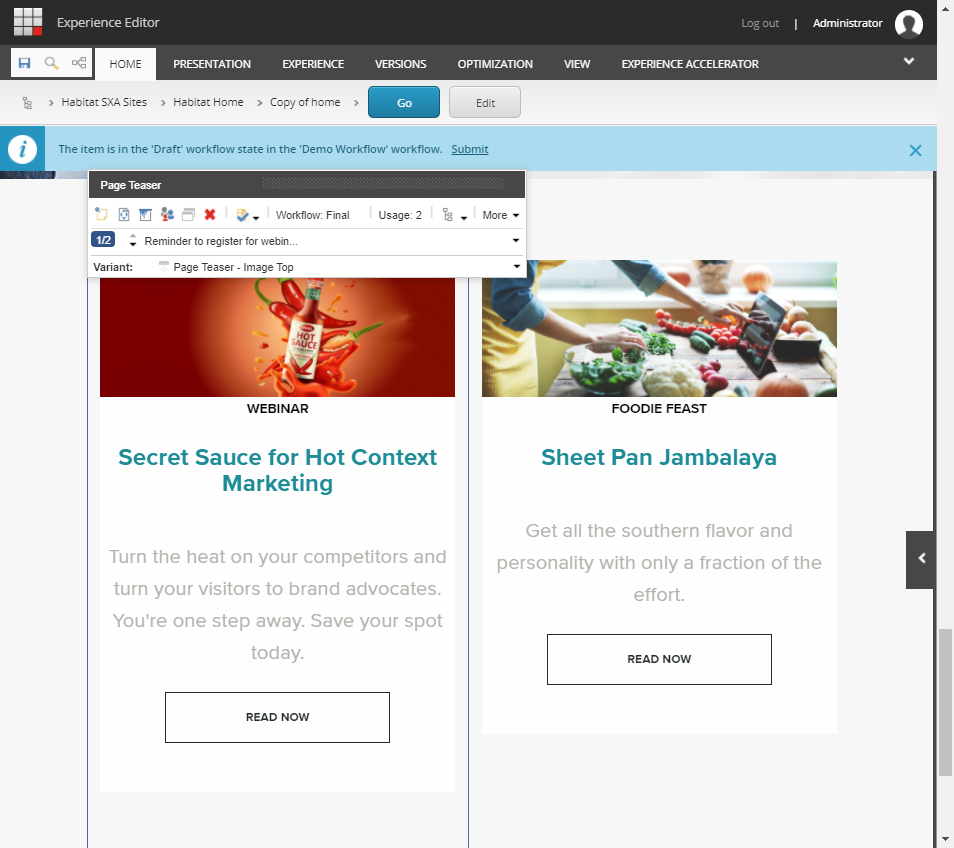
You should now see your homepage in the Experience Editor. You can navigate to any page you’d like to show the callout on. For this example, we’ll personalize an existing callout component on our homepage.
Second: Create a personalization rule
- Click on the component you wish to personalize. This should bring up the floating toolbar
- In the floating toolbar, click the Create or edit personalization for this component icon
- In the Personalize the component dialog box, click the blue plus sign to add a personalization rule
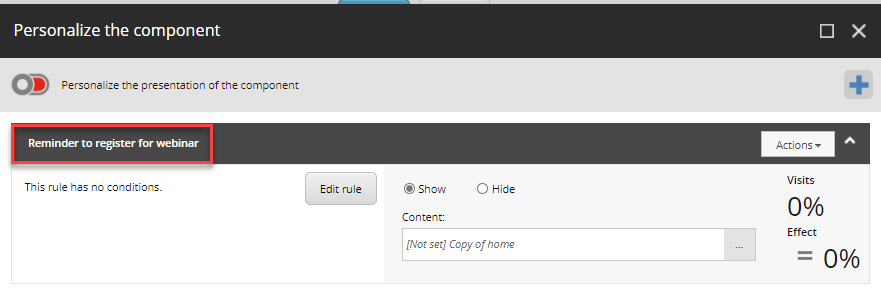
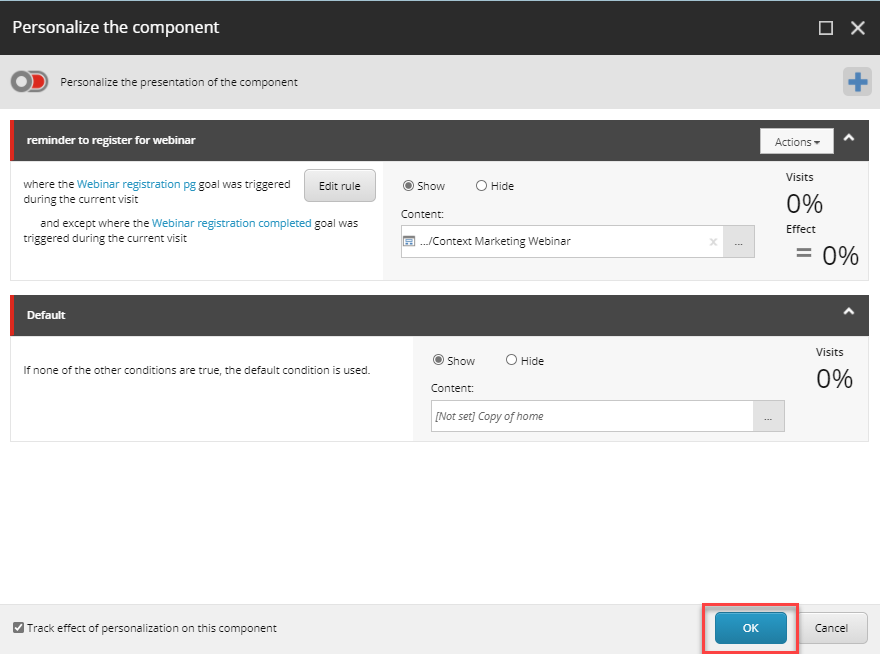
- Enter a new name that describes this personalization scenario, for example, reminder to register for webinar
- In this example, we want to show this reminder to users who visited the registration page but didn’t register. One way to do this is by creating a rule to show the reminder to users who triggered the Webinar registration pg goal but didn’t trigger the Webinar registration completed goal. We created these goals in a previous post
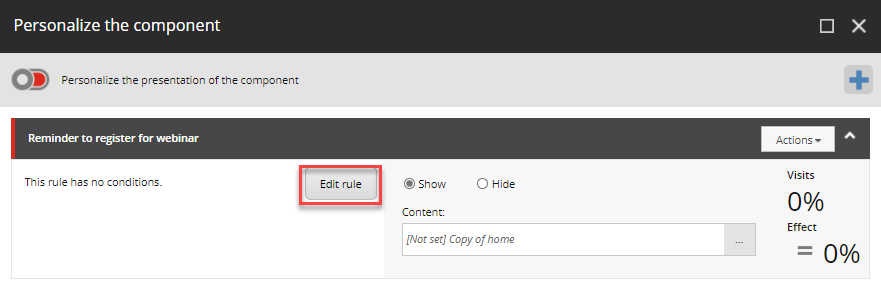
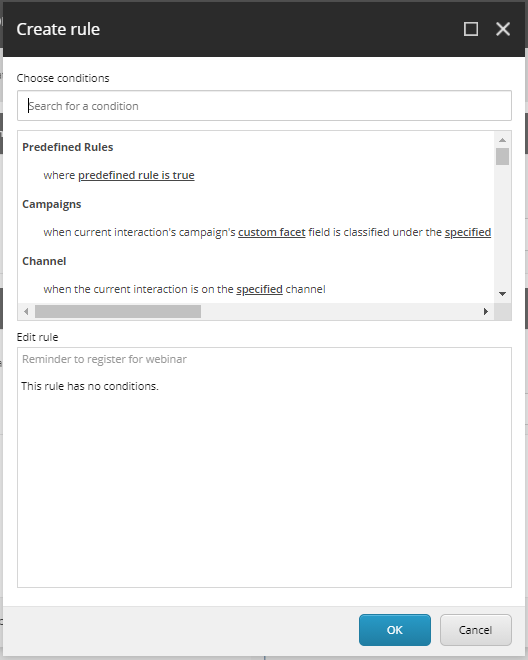
To create such a rule, in the Personalize the component dialog box, click Edit rule
- The Create a rule dialog box is where we define conditions that, when met, we’d like to activate personalization. This is done by searching for a condition in the Choose conditions field, selecting the one that matches our need from the box below, and then adding the parameters in the Edit rule box below.
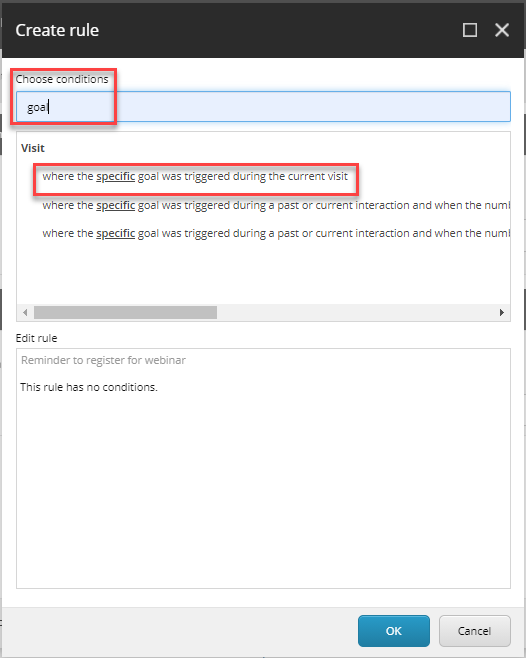
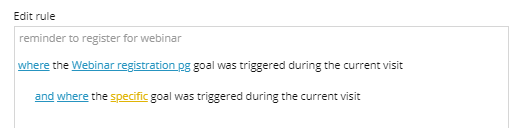
Sitecore rule editor comes with a lot of conditions out of the box, and you can add custom conditions with the help of your Sitecore partner. For our example, we’ll search for ‘goal’ in the Choose conditions field. This will bring up a few matches. For simplicity, we’ll select where the specific goal was triggered during the current visit. Keep in mind that this will show the personalized callout only to those users who visit the landing page during the same session. It will exclude those who visit the landing page, do not register, leave our website, and then come back to it later.
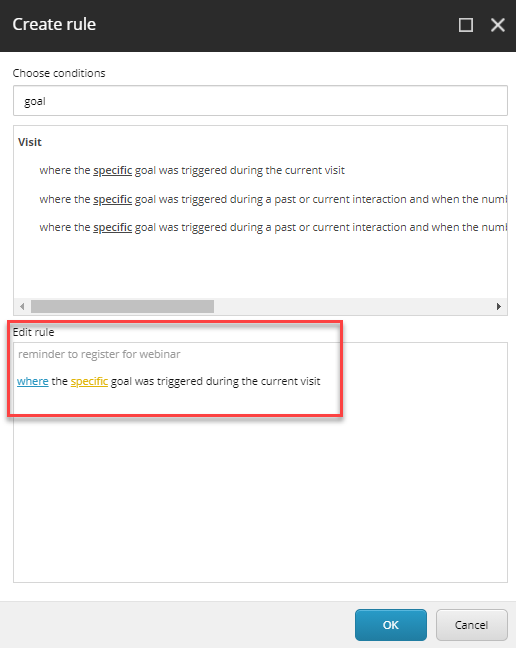
- When we click the desired condition, it gets added to the Edit rule box, where we can, well, edit the rule. The yellow links are placeholders. We need to click those and set values.
For our scenario here, we’ll:- keep the operator as where
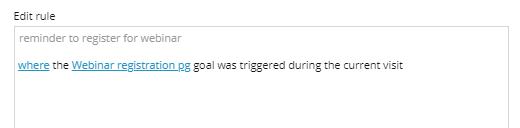
- set the specific goal to webinar registration pg
- click ok
At this point, the condition is set up to trigger personalization when the user has visited the registration page. So, we need to exclude those who had registered. To do that, we’ll need to add another rule
- Click the where the specific goal was triggered during the current visit again. This will add another rule in the Edit rule box
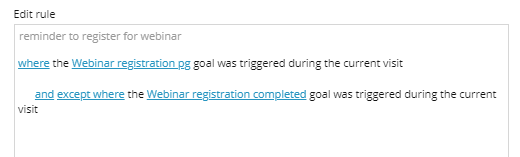
- We’ll click the operator where to change it to except where, and we’ll click specific and choose Webinar registration completed
- Click ok to close the Rule editor
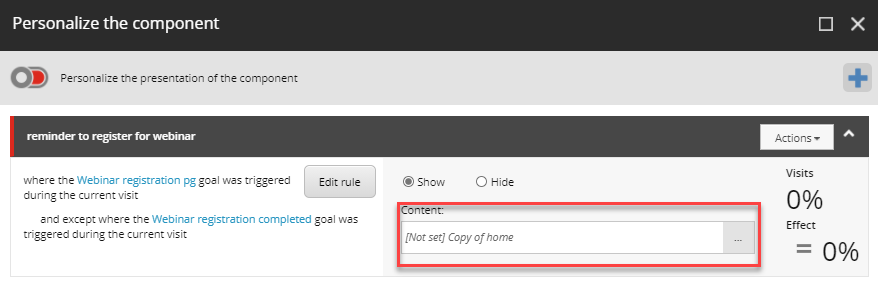
- The Personalize the component dialog box should look something like this

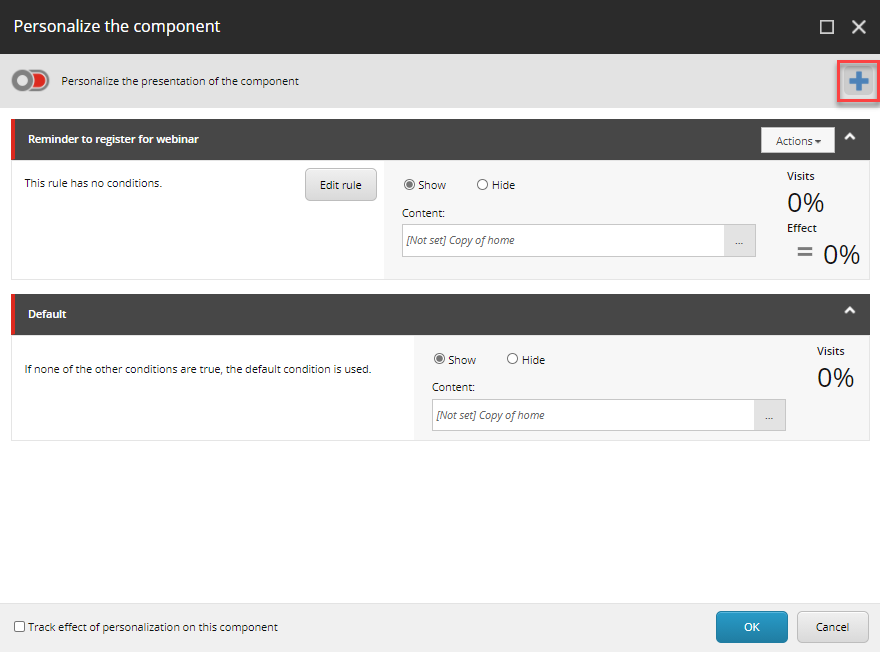

It shows that we have defined the condition/rule as to when to trigger personalization, but we haven’t specified what personalization would look like. So, we’ll do that next
Third: Personalize the content
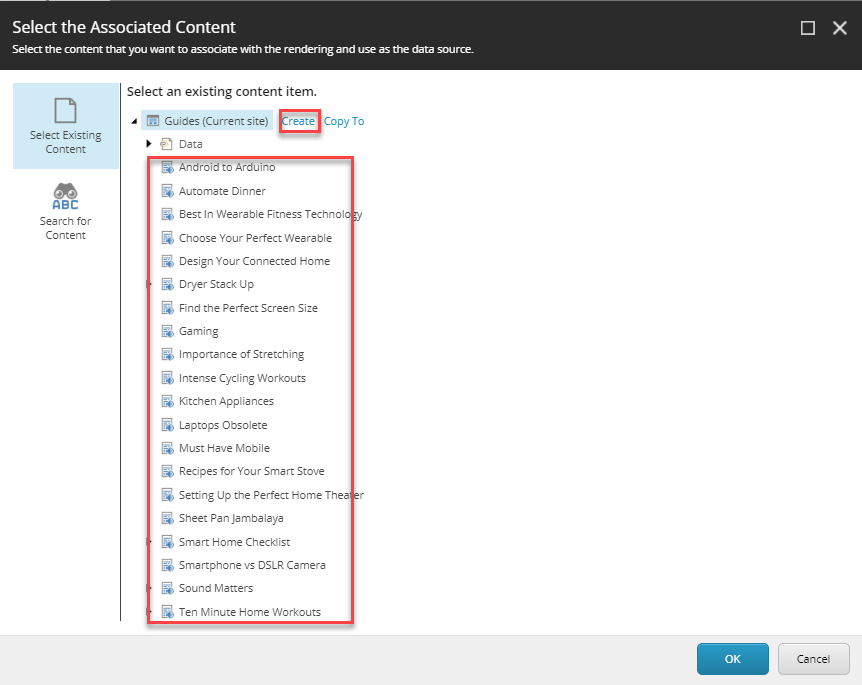
- Next to the rule we have just created, click the Content field to choose what you’d like to display in the callout.
I have created my content in advance so I can select it from the menu. If you haven’t, you can go ahead and create content by clicking Create
- Now that we have set the rule up by defining the condition and the content we want to display, we can click ok
Finally: Review personalization
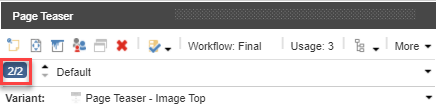
- Now that personalization is set up, the floating toolbar will indicate that by showing the number of variations this component has. In our case, there are 2 variations: the default one, and the one that will show to users who visited the webinar registration page but didn’t register. We can see this indicated as 2/2
- Use the little arrows next to 2/2 to toggle between the two variations to see what each looks like
And there you have it! A personalized component that shows different content based on goals triggered by users. Remember that this is a simplified scenario to demonstrate how rules-based personalization works in Sitecore. Now that you know the basics of how it works, you can experiment with much more refined scenarios and get fancy. Just remember that it’s always a good idea to start simple and grow from there. If you happen to stumble upon any problems or questions, feel free to ask in the comments below. Happy personalization!