

Ciao audience, it has been a while since my last blog post. Coming back this time to answer a practical and good question from one of our blog followers about how to create custom maps for Sitecore Path Analyzer.
Sitecore’s documentation covers creating custom maps on a high level. This post takes a deep dive and does not spare the details. The goal is to help discerning marketers and analytics specialists track users’ behaviour as they take specific paths through the website so that no opportunity for optimization is missed.
If you are not familiar with Sitecore Path Analyzer, Sitecore's Path Analyzer for marketers and web analytics specialists on our blog is where you want to begin.
If you are familiar with the basics of Sitecore Path Analyzer and its out-of-the-box maps, let us walk through this blog post together to learn and start setting up your very first custom map which shows the traffic to your website that meets specific criteria such as taking place during a specific period of time, or on specific pages of your website.
Without further ado, let us begin:
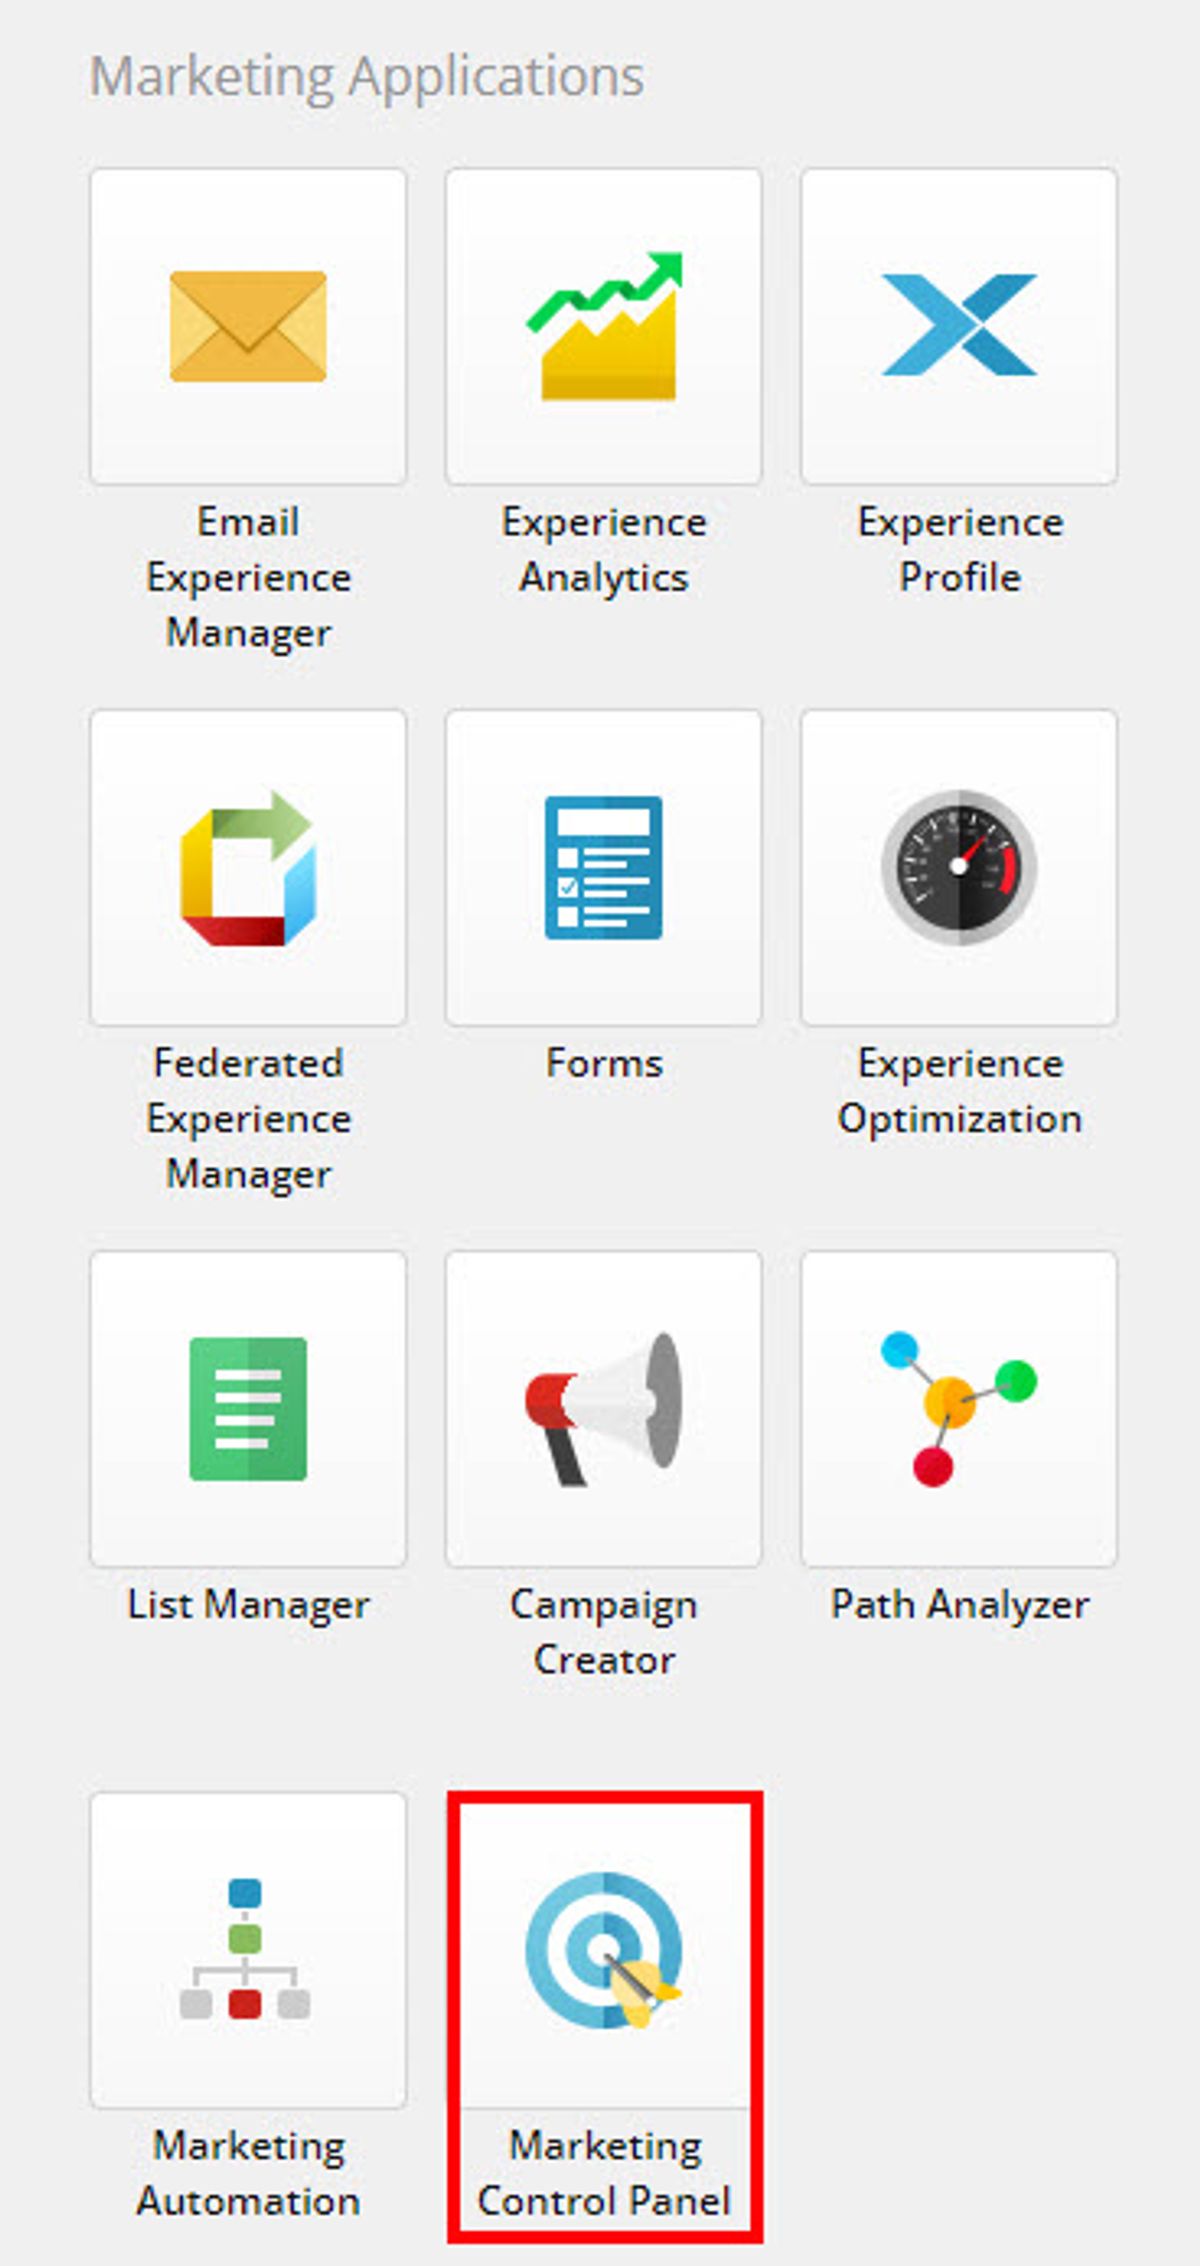
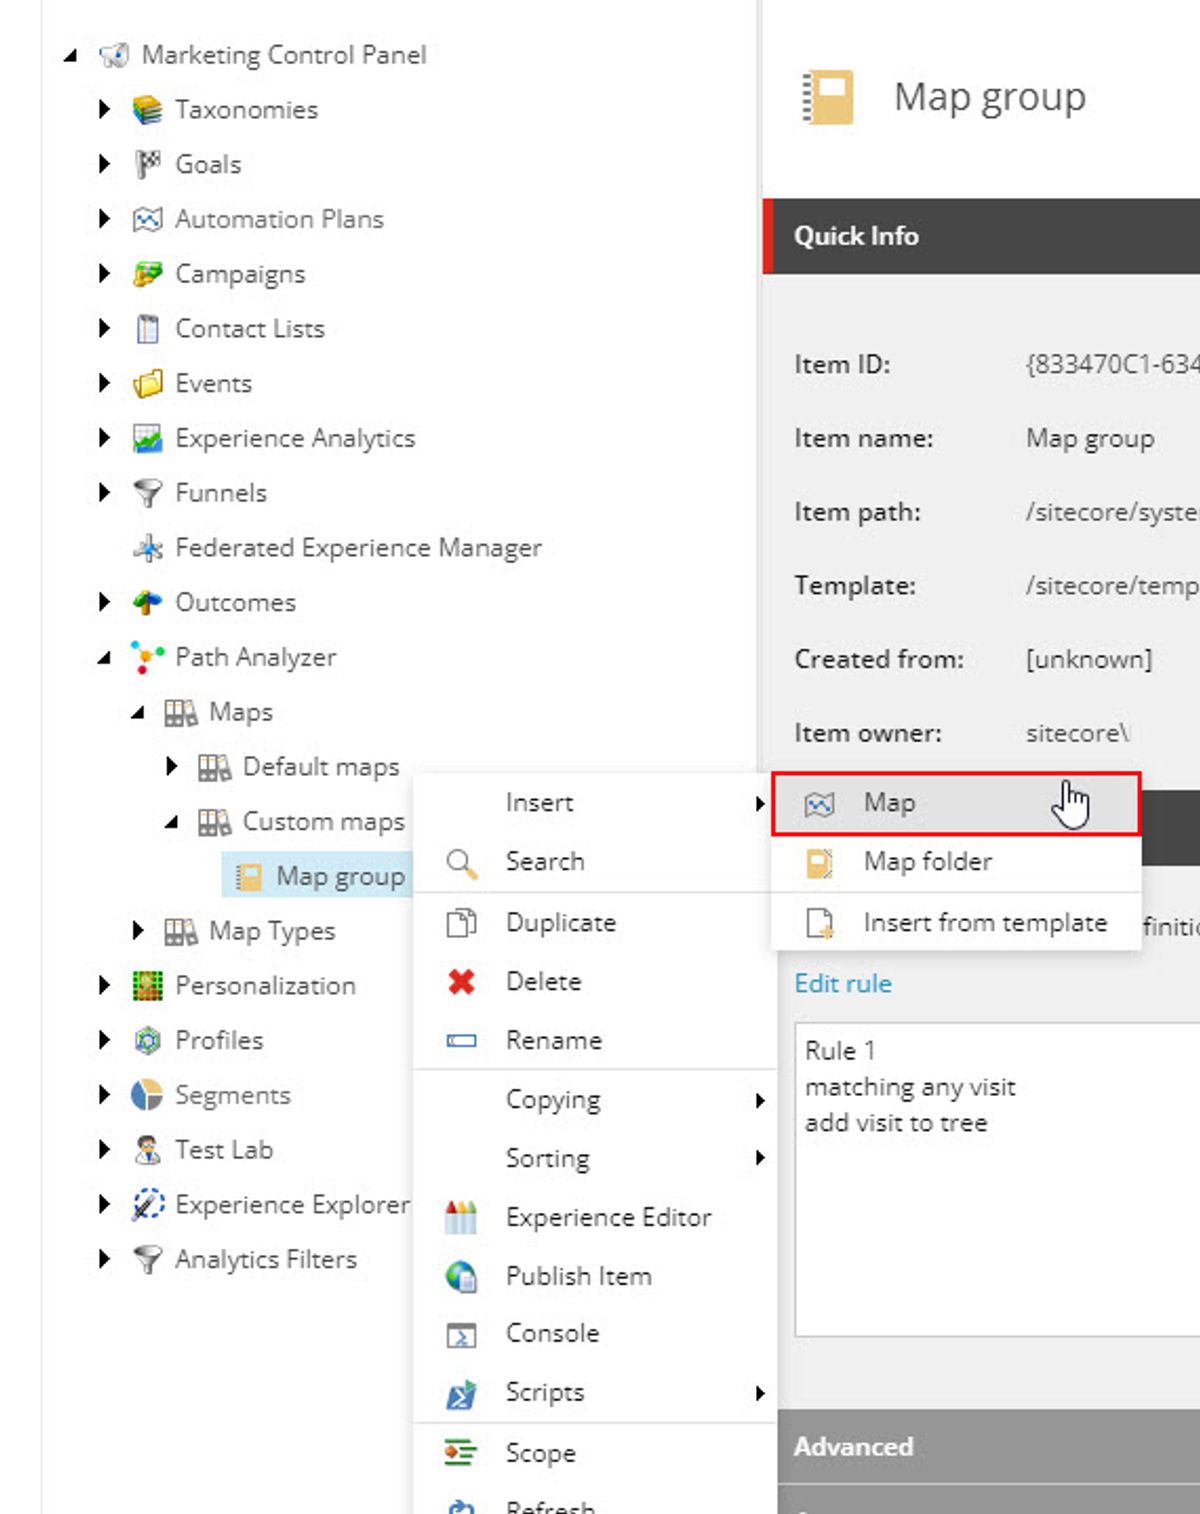
From Sitecore Launchpad, under Marketing Applications, select Marketing Control Panel.
Navigate to Path Analyzer -> right click on node Custom maps -> Insert a Map group.
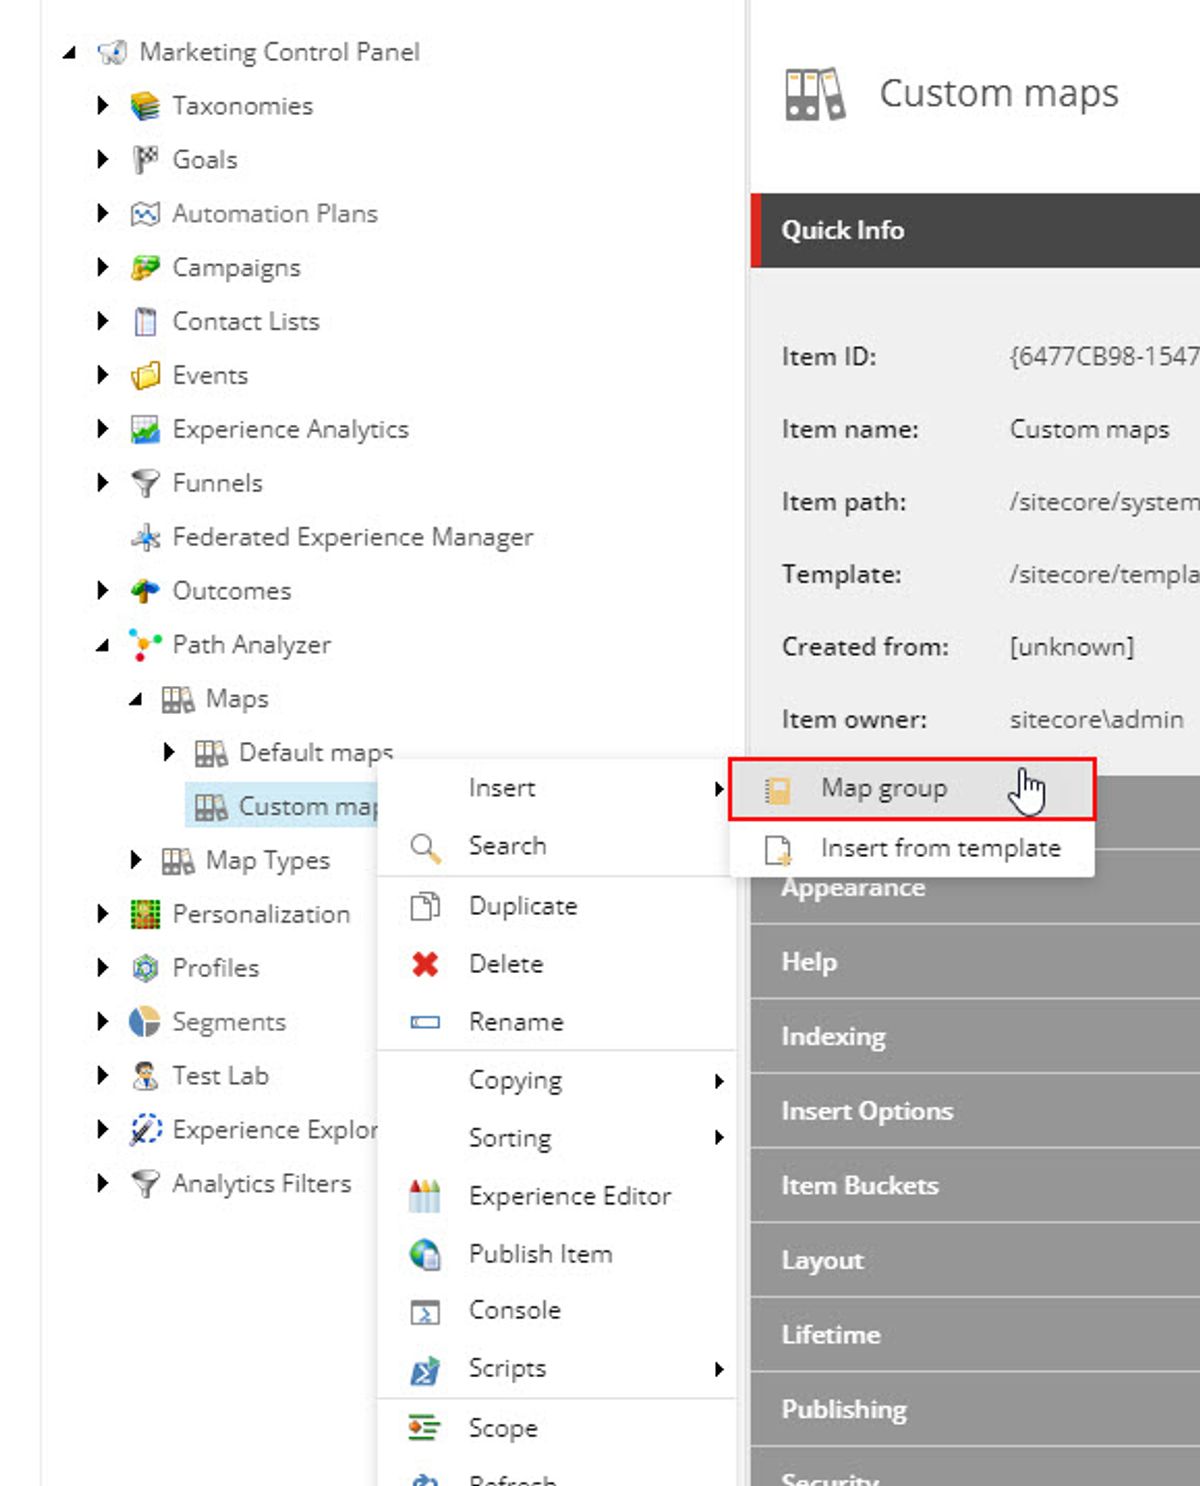
The map group is your first filter which helps you leave out the unnecessary visits and only allows the ones that meet your criteria to go through for further filtration.
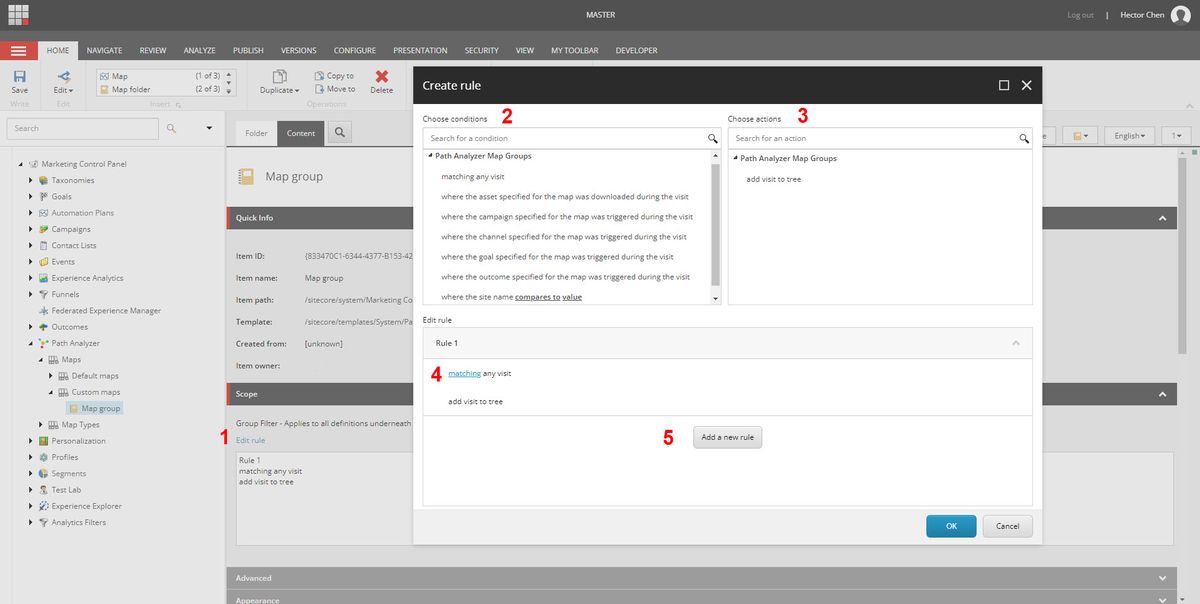
1. Click Edit rule to start setting up your filter.
2. Search for a condition which the traffic needs to meet and click the condition to select it.
3. Search for an action which Sitecore takes when the traffic meets preset condition(s). Even though there is only one option in my screenshot, it is possible to add more custom actions through code.
4. You can edit the rule in the Edit rule box.
5. Click Add a new rule to add more condition(s) to your filter.
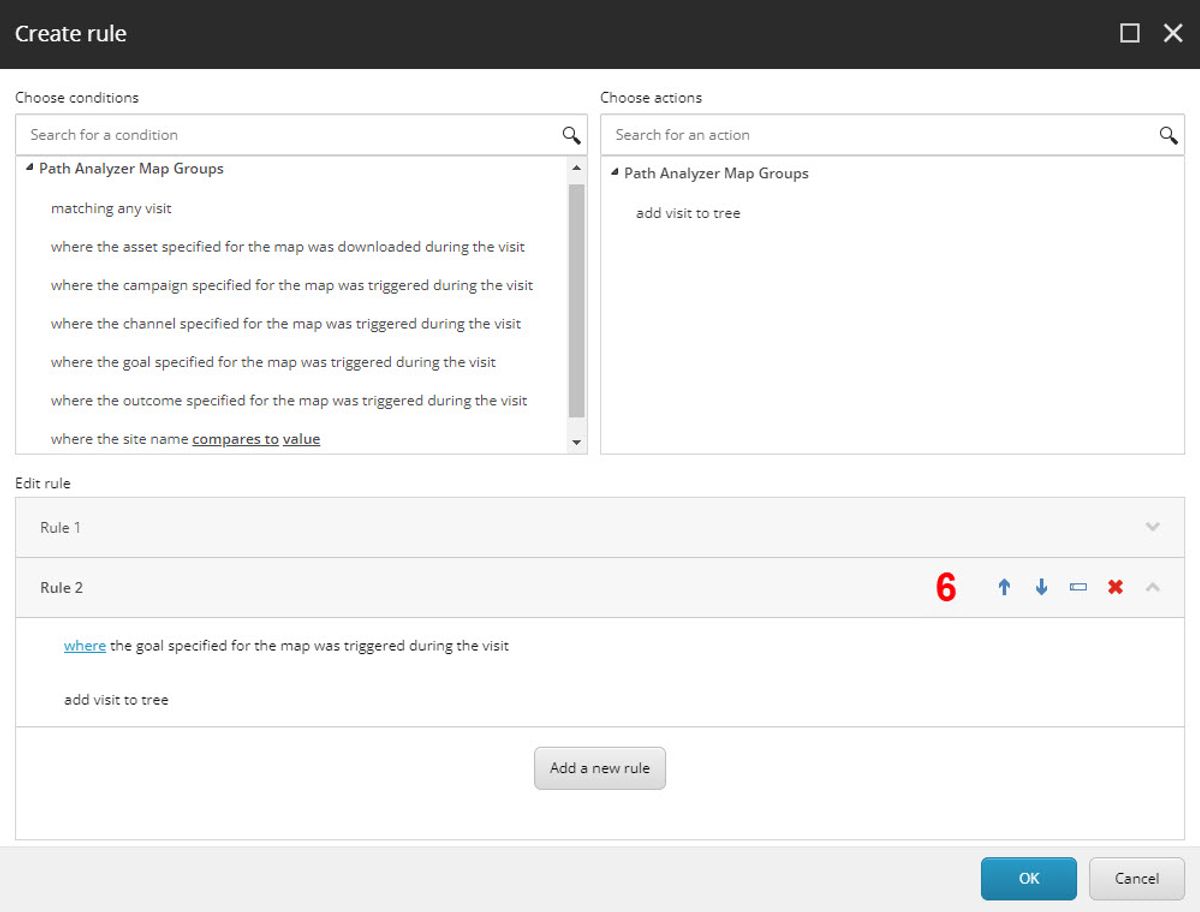
6. Manage the rules by adding, rearranging, or removing rules as needed.
After the setup, save your changes and right click the newly created Map group node -> Insert a Map:
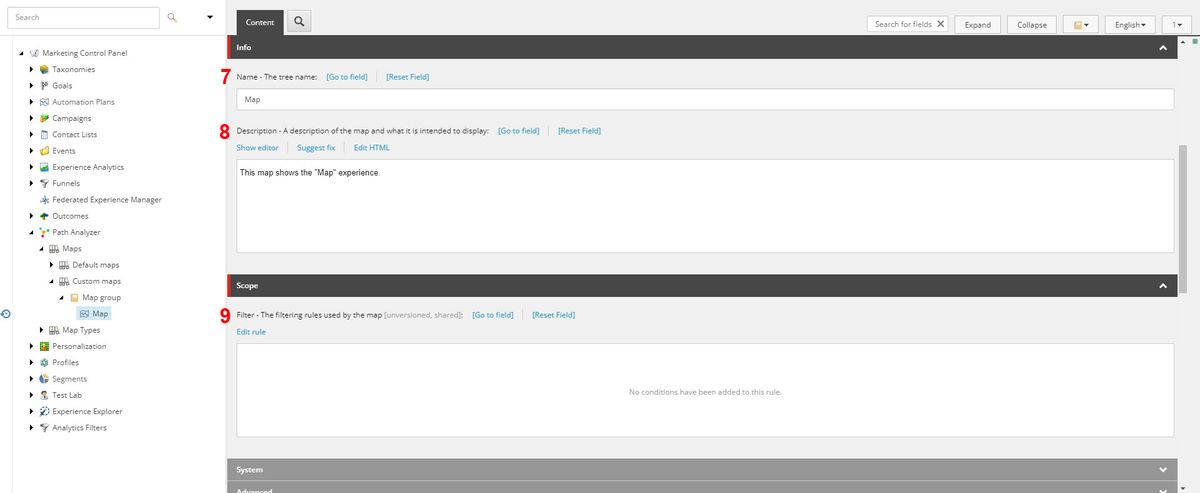
7. Provide a Name for this new custom map.
8. Provide a Description of your map.
9. Click Edit rule to start setting up your second filter - this is like creating conditions for an A/B test.
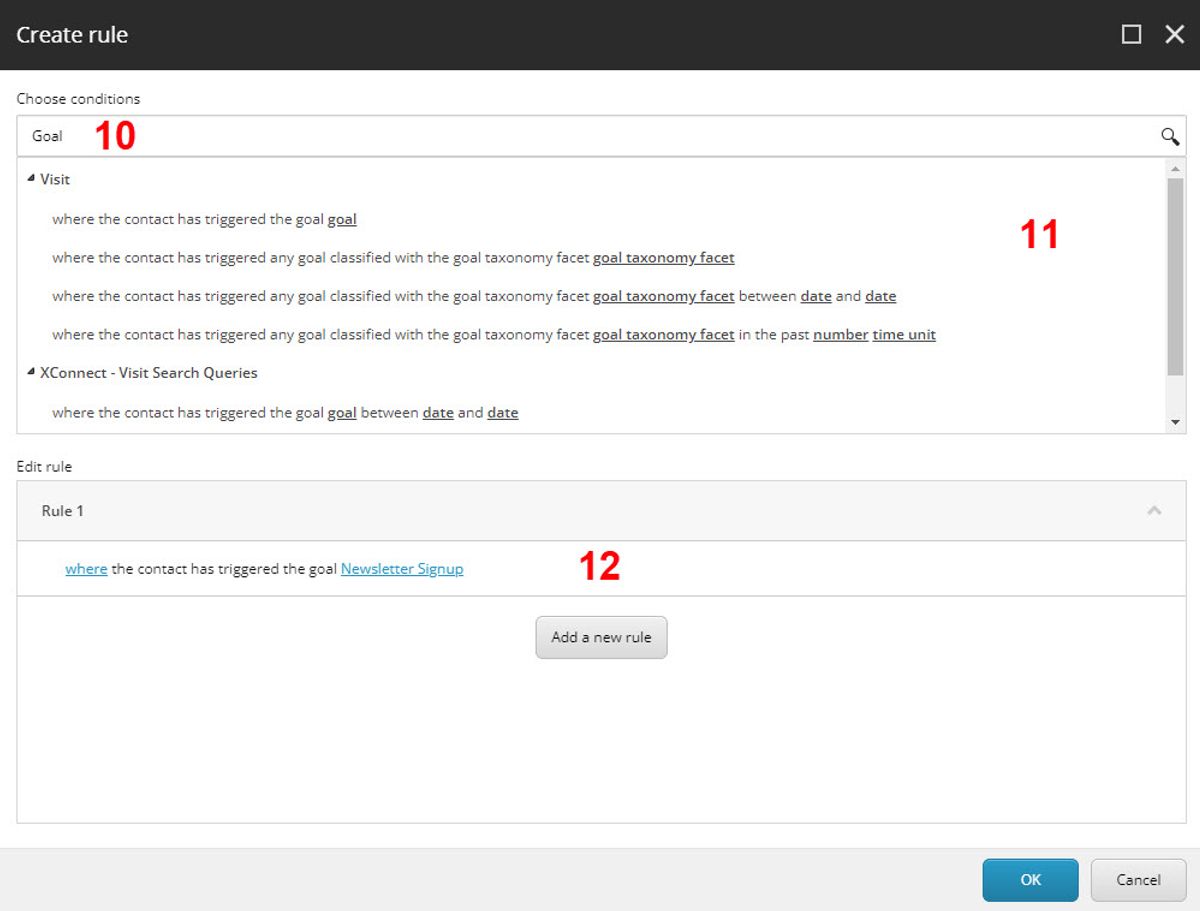
10. Search for a condition which the traffic needs to meet and click the condition(s) (a goal, event, traffic channel, profile, are some examples) and select.
- A practical use case: I have a new product page that can be reached via certain CTAs placed within my website, how does my custom map show all the paths that bring the visitors to the product page? Solution: I can create goal that gets triggered as visitors land on the product page, then set up the condition as triggering that goal. Explanation: Sitecore Path Analyzer’s custom map would show you all the traffic that triggers your goal and the data associated with them.
11. Under session Edit rule, specify all the parameters of your selected condition(s).
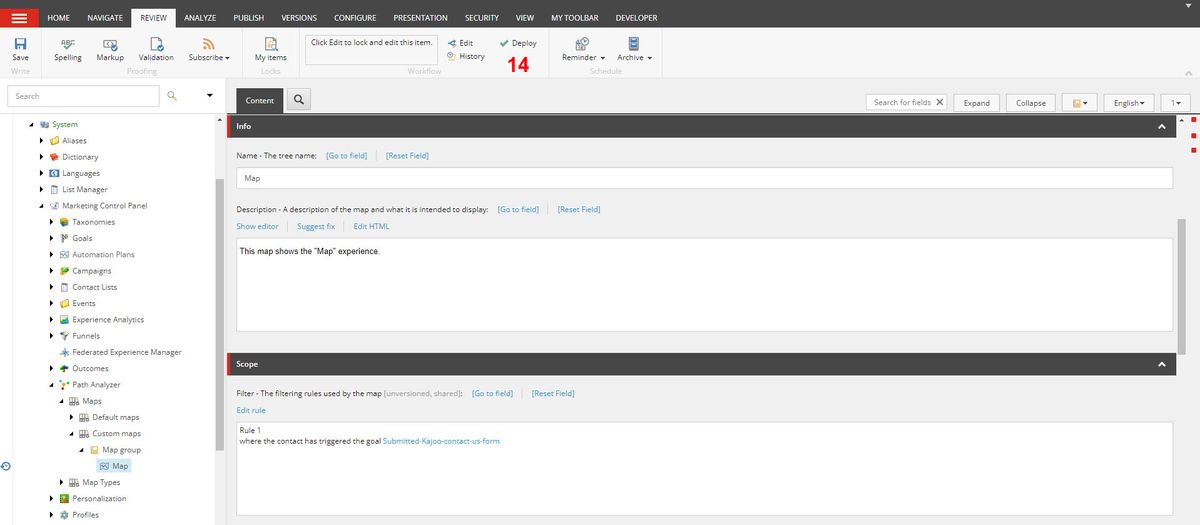
Click OK and save your changes.
On the Sitecore ribbon, go to tab Review -> Click Deploy under session Workflow to make your changes live and ready to use.
After this step, give the new custom map some time so that it can accumulate data from your website. The time varies depending on your website’s traffic.
From Sitecore Launchpad, select Path Analyzer under the Marketing Applications group.
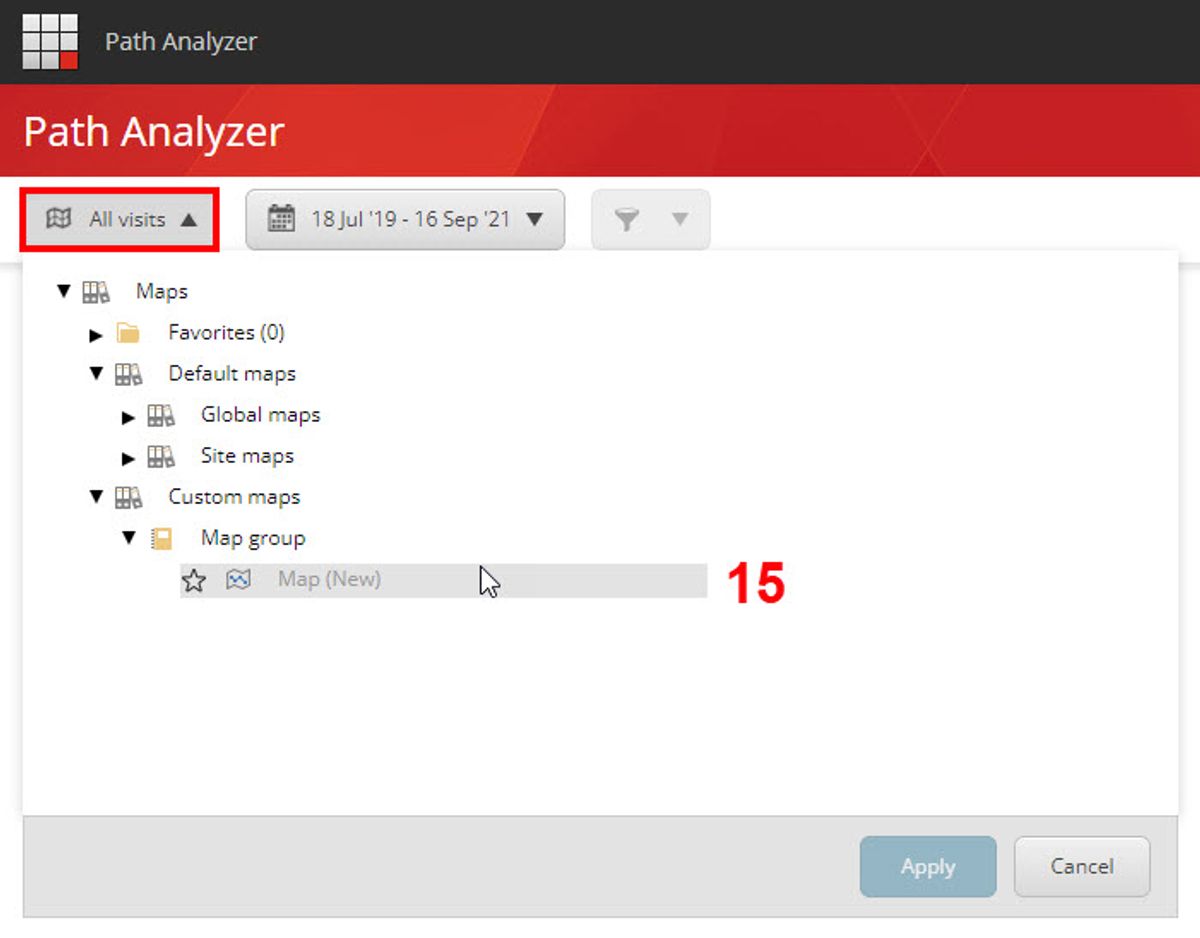
There is a filter group on the top left corner of the Path Analyzer dashboard, click the Maps filter -> navigate to and select your custom map, which should be located under the path Maps -> Custom maps -> [your newly created map group].
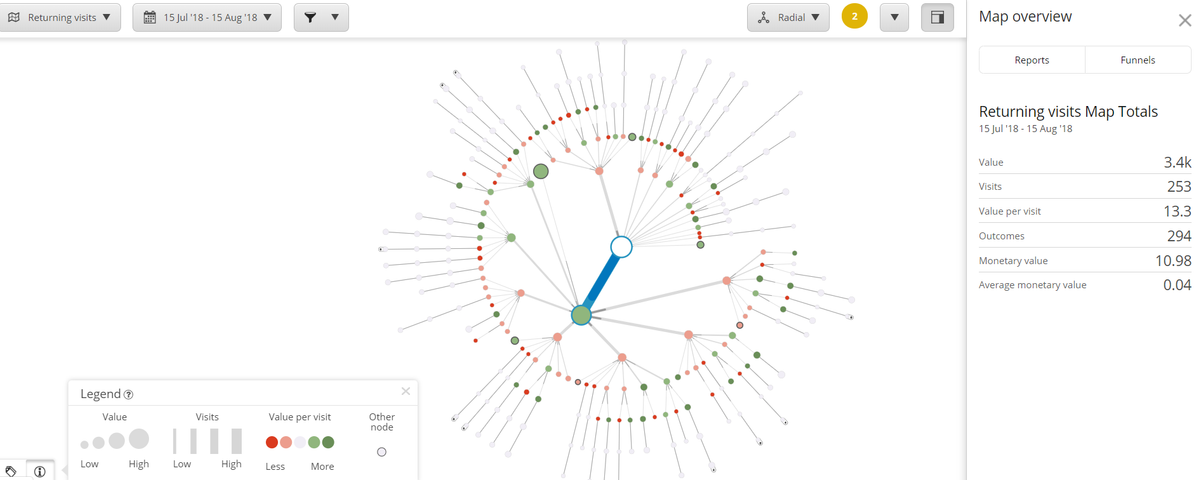
With good amount of data accumulated, you start seeing traffic in different map views and details.
I hope the instructions in this post are clear and will help you start your own journey of creating custom maps! If you have further questions, please feel free to submit the form below.
In this series
Sitecore's Path Analyzer for marketers and web analytics specialists Sitecore Page Analyzer