The first step in our Agile Context Marketing Mini-series is to create a landing page that holds a Sitecore Form. We’ll be using the Sitecore Habitat demo site for the sake of speed in getting to the main pieces of this series. We’ll also keep the content of this page very simple. Let’s begin!
- Login to Sitecore and open the Experience Editor.
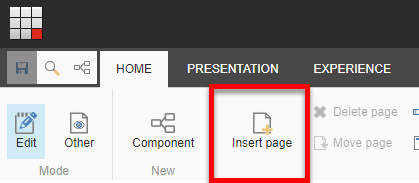
- From the Home page click on the Insert page button. This page won’t be attached to the menu system since it is a landing page and we’ll drive visitors to it using other methods. If you want to place the page in a specific location or folder, you can move it later without any issues.
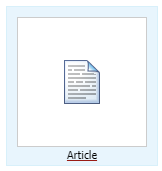
- Select the Layout or Rendering Type. In our case we’re going to use the Article type, give our page a Name (Webinar Registration), and click the OK button.
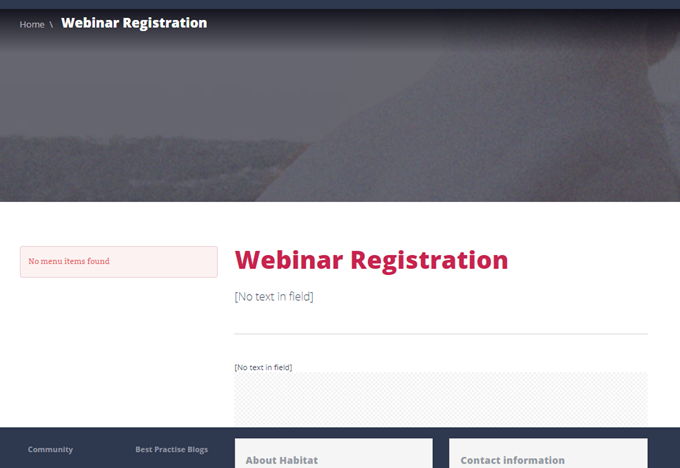
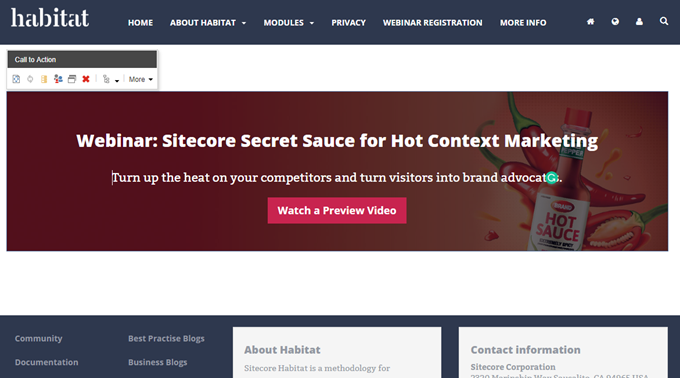
- In a moment your page should appear and in our case, the body looks like this:
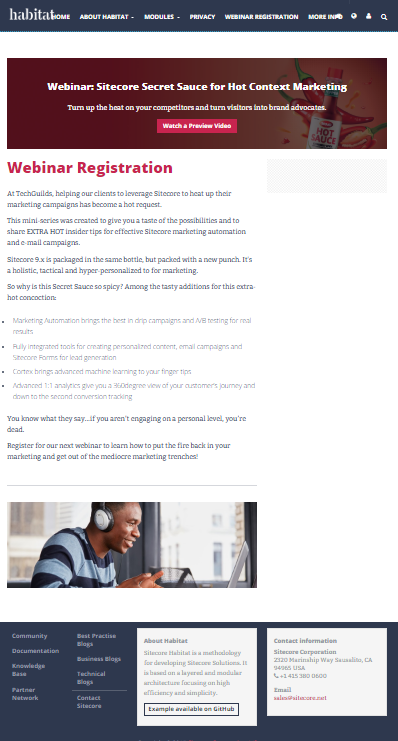
- Unfortunately, it’s not what we’re after so we’re going to reconstruct it to look like this:
- We want to replace the breadcrumb and banner with a CTA Video link promoting the Webinar at the top
- We want to replace the left menu sidebar section with a right sidebar section to eventually hold a Sitecore Form
Replacing the Breadcrumb, Banner, and Left Sidebar Section
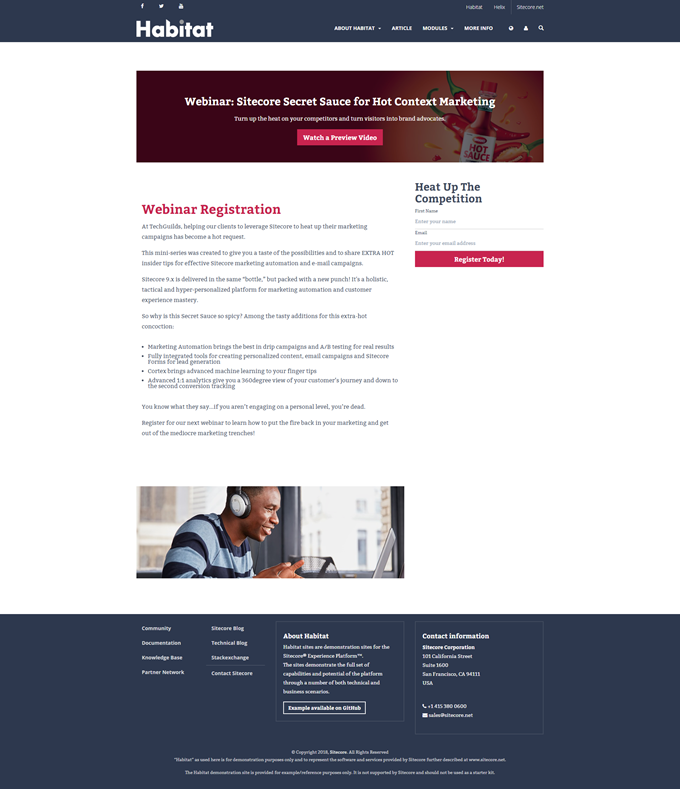
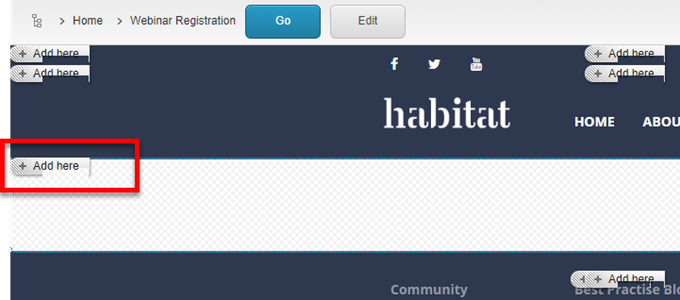
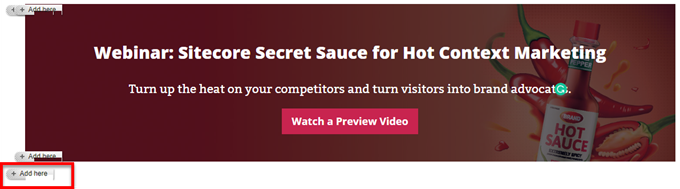
- Click on the Banner area to display the Component Toolbox and click on the red X to remove the existing Page Image Header component.
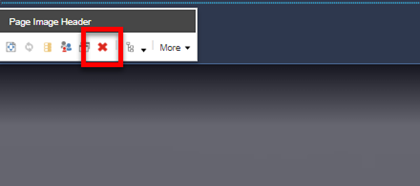
- Next, to remove the Left Sidebar section, click in the white space below the “no menu items found” message to reveal the Component Toolbox for the Article Aside Left component, then click the red X to remove it.
Add a CTA Banner
I’ve already created the content that will go in my banner. I always recommend you create all your content pieces in advance so stitching them together and creating the campaigns are much quicker.
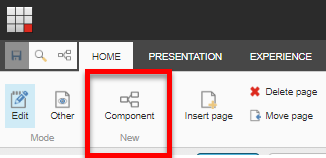
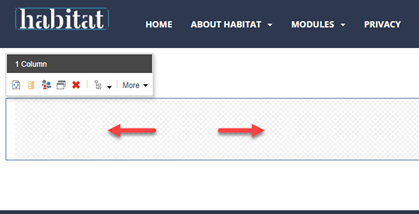
- Now that we have a blank slate, click on the Component button (on the Home ribbon), to reveal the Placeholder locations (the Add here buttons) indicating where you can add components.
- Click on the third Add here button on the left, to begin adding a new component.
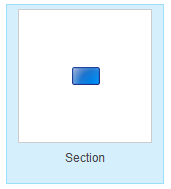
- Select the Section component which is a container used to reserve a “row” of content.
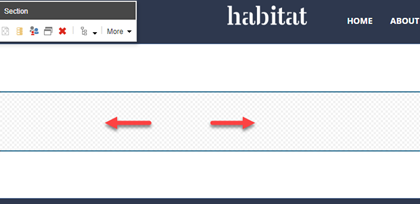
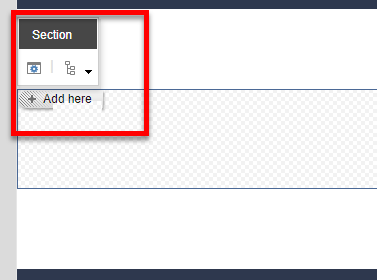
- You should now see the Section added. Next we’ll add a column to the section. The column is designed to center content on the page rather than taking up the full width. Click on the placeholder area on the newly added Section to reveal the Add here button.
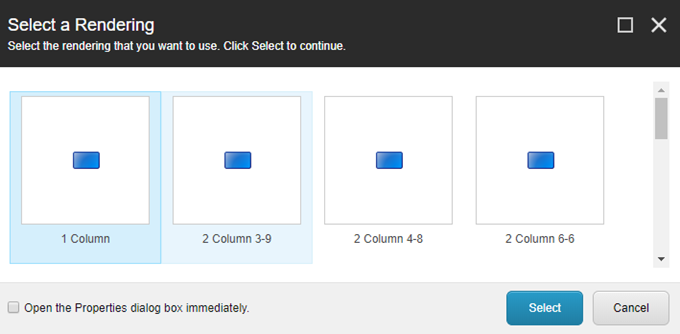
- Click the Add here button and from the Select a Rendering dialogue box, select the 1 Column layout.
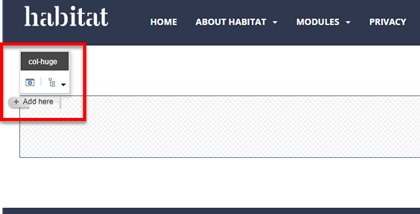
- Click on the placeholder area on the newly added Section and click on the Add here button that appears.
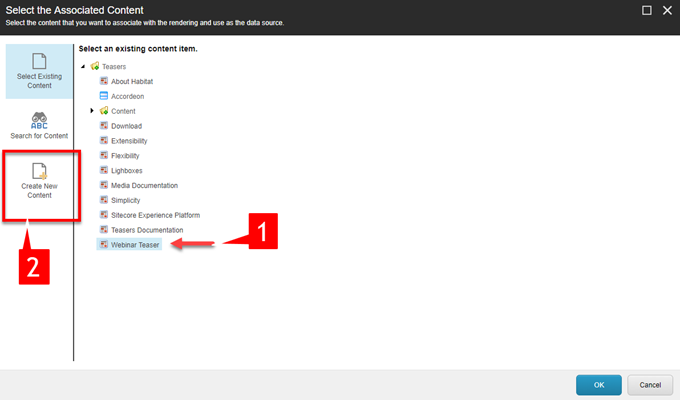
- Select Call to Action and click the Select button to move to the next screen where you will choose which content to use for your call to action. In my case, I’ve created and will choose Webinar Teaser (1). If you don’t have an existing piece of content, you can click on the Create New Content (2) button on the left.
- You should now have a CTA promo banner on your screen.
- Let’s Save our progress so we don’t lose all our hard work.

The Final Stretch
Well, now that we’ve got a nice banner, let’s add the main content area with a right sidebar area for the registration form. We’ll add some content, but create and add a form in the next post.
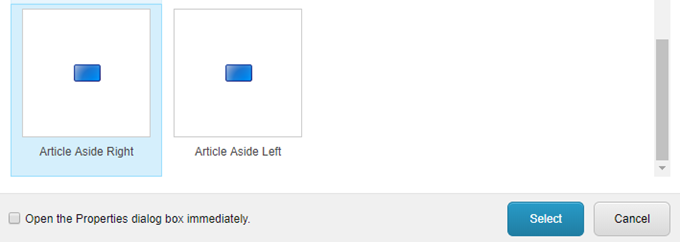
- Click on the Component button (on the Home ribbon), to reveal Add here buttons and click the second one located below the banner.
- Select the Article Aside Right rendering from the Select a Rendering dialogue box. Rendering is a fancy word for layout component.
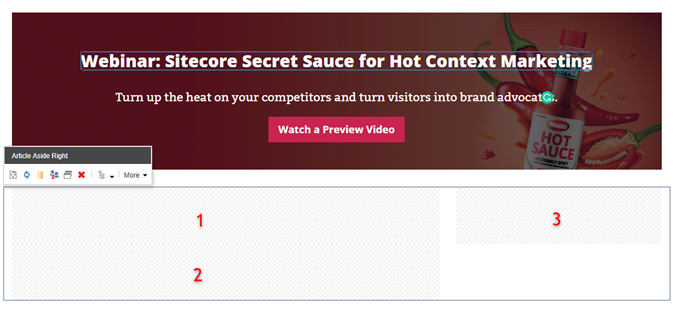
- Your page should now look something like this, with the Article Aside Right component selected, which contains three placeholders.
- Click on the first placeholder (#1) and then click Add here. Select and add the Page Header (or Page Title depending upon the Habitat version) component to the page and then click on the [No text in field] placeholder to add some text. Click the Pencil icon to open the Rich Text Editor for more editing options.
- Our page is coming along very nicely, so let’s take a break and save our work.

We will continue the page in the next post where we’ll be creating and adding a Sitecore Form to capture some leads.
In our screenshot below, you will notice that we also added some more content. Actually, I added a video to make things interesting. Feel free to play around and add content to that area if you like. However, it’s not mandatory.
Up next…Creating and Adding a Sitecore Form to a landing page