
It can be hard to explain what Helix is, to non-developers and developers alike. Illustrative of this fact is the ambiguity of the appropriate preposition; do you develop with Helix? In it? Is it something you buy and need a license for? (No.) Is it a philosophy? Can anything be Helix with the right attitude? (Also no.) Some of the confusion comes out of it having a proper name. Phil Wicklund and Jason Wilkerson in Professional Sitecore 8 Development make the wise choice of simply referring to it as “Sitecore Modular Architecture.” That’s precisely what Helix is: an architectural configuration for Sitecore solutions based on modularity.
Helix streamlines development by systematically managing dependencies. In practice, this method involves multiple visual studio projects within a single solution, with some of these projects acting as a base for others. There are three “layers” to a Helix solution: the foundation layer, the feature layer, and the project layer. What goes in these layers may vary from project to project, but a useful way to think of it is this: the project layer contains your front-end web code (layouts, styling, etc), the feature layer contains your components, and the foundation layer contains code and features at the core of your project.
In this post I aim to walk you through the steps necessary to create a Sitecore Helix project from scratch, utilizing best practices. Sitecore has the popular Habitat project available for download and perusal, which I encourage you to do. However, think of this blog post as a cooking show and Habitat as the already-made dish sitting in the oven. I want to show you how you get from here to there. By the end of this post you won’t have something as complex as Habitat, but you’ll have a web page with a component on it created with proper Helix methodology. In future posts we’ll build on the work we’re doing here. So let’s get started!
Basic Sitecore Setup
First you’re going to need to install an instance of Microsoft SQL server. The particulars of that setup are outside the scope of this post, and each version of Sitecore has different requirements as to which version they can work with (Sitecore 9.x, for example, requires SQL server 2014 and up). You can find the appropriate version of SQL server for your version of Sitecore in the Sitecore Compatibility table. For this project I’m using SQL Server 2014 SP2 for Sitecore 8.2. When you set up SQL server, make sure you run in mixed authentication mode (or SQL Server and Windows Authentication mode) and that the sa account is enabled and you know the password. You’ll need it for Sitecore setup.
Next you’ll install IIS if you haven’t already. You can actually do this without downloading anything by going into Control Panel, then to “Turn Windows features on or off,” and selecting Internet Information Services. Make sure you include ASP.NET 3 and 4 when setting this up. My version of Sitecore (8.2) requires the .NET Framework 4.5 to run correctly, and I had to download it and install it from Microsoft to get Sitecore to work.
Once you have that installed, you can install Sitecore. I imagine many of you reading this will already be working with a version of Sitecore and will have bought a license. In fact, you need a license. In any case, here’s Sitecore’s download page. The setup is fairly straightforward and requires your SQL account username and password. You can also set it up through Sitecore Instance Manager, which is a handy tool. Make sure you remember where you install Sitecore - it’ll be important for publishing later on! The one obstacle I ran into that I’ll mention is that I needed to enable user permissions for IIS for the folders inside the wwwroot directory. After you run through this you can launch Sitecore!
Aside from SQL Server, Sitecore requires another kind of database: MongoDB. This software handles all the user tracking information. You can check which version of Mongo you need on the Sitecore Compatibility table. Parts of your site may not work without it, so make sure to follow this step. The setup is extremely simple and you most likely don’t need to do anything other than install it on your machine. The previously-mentioned Sitecore Instance Manager also makes installing it a breeze, which can be done through its “bundled tools” menu.
Before we can get into setting up a Helix project, you need to take the crucial step of setting up Visual Studio. If you don’t have it installed already, go ahead and do that, and make sure to include the libraries for ASP.NET, web development projects, and MVC. Once Visual Studio is installed, it’s time to create a Sitecore solution.
Setting Up the Helix Solution
In Visual Studio, we’re going to create a blank solution. Navigate to where you want to create your repo in the file structure. I suggest locating the solution somewhere not far from the disk you’re using. In this case, I’m using C:\Repos\TGBlog\. After doing so, right-click on the Solution in the solution explorer in VS and create four new solution folders: Foundation, Feature, Project, and Configuration (I’m calling mine _Config). Three of these correspond to our Helix layers and the config folder will eventually contain some necessary files to tie it all together.
In the file structure where your solution file (.sln) is located, create a \src\ folder. WHY? This is just Helix convention, but the \src\ folder will also be used later for gulp.js setup. Go ahead and create the same folders with the same names in your \src\ folder in the file explorer. WHY? When you create new projects in Visual Studio you’ll browse to these folders. You can also create the paths when you create a project and the folders will be created automatically.

Making a Module in Helix

Now it’s time to add some meat on these bones and add a project to our Helix structure. Let’s make a Feature project first. Create a new folder in VS with the name of your first feature - in this case, call it BasicContent. You can then either create a corresponding folder in the “feature” folder under /src/ in the file structure, or append the project name to the location path in the Add New Project window in the next step to have it made automatically. Right-click the BasicContent folder in Visual Studio and add a new project. You’re going to select a new ASP.NET Web Application. When you create a new project in Helix, you’ll initially name it “code”, then rename it in VS to the Helix standard. WHY? Helix project convention specifies that in the file structure on disk, all of the code should be in a “code” folder underneath the folder with the module name. Naming the new project “code” will place all the project code in the right place.
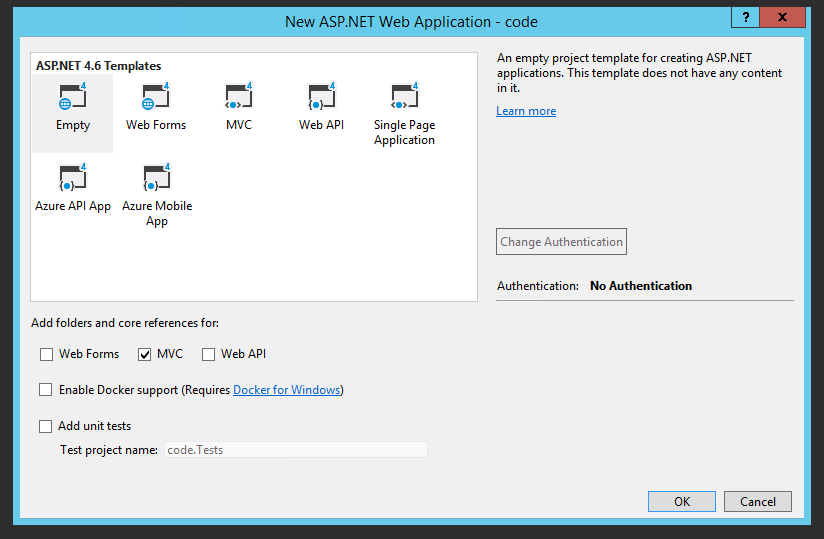
Before we rename the project, we need to finish making it. In the next window that comes up, select an Empty project and check the “MVC” box to add the proper folders and core references. Click OK and you’ll then have a new ASP.NET project in the right place. There are some things in this project you don’t need - go ahead and delete Global.asax and the App_Start and App_Data folders. Then add an App_Config folder. There are also two Web.config files in this project, one in the root and another in the Views folder; open the properties of these and set “Build Action” to “None” and “Copy to Output Directory” to “Do not Copy”. Doing so will prevent these files from messing with the solution as a whole.
Now we’re going to rename the project to the Helix standard. The naming standard is fairly simple, and divided by periods like a namespace. The first part of it is “the overall customer, partner, or solution name.” In my case, it’s TGBlog. The next parts correspond to where the project lives in the solution structure. This project is in the Feature Layer, and we’ve named the module BasicContent. So we’re going to rename our project TGBlog.Feature.BasicContent. We’re actually going to do this in three different places. First, right-click the project, currently named “code,” and click properties. Change both the Assembly name and Default namespace to [YourSite].Feature.BasicContent. Simple. Finally, right-click the project again and rename “code” to [YourSite].Feature.BasicContent as well.
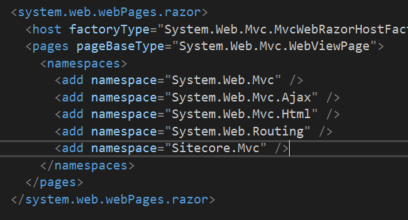
One more crucial step: in the Web.config file in the Views folder, make sure you remove the reference to the “code” namespace, as this can mess up your renderings. While you’re there, add a reference to Sitecore.Mvc, as this will help IntelliSense recognize your Sitecore HTML helpers. Also go ahead and change the version number of System.Web.Mvc to be the correct one for the project.
Next, you’re going to add Sitecore packages from NuGet. (Before doing so, you may need to add the official Sitecore Nuget feed to VS, as outlined in this helpful blog post by Jeremy Davis.) Right-click the project to manage NuGet packages, and add Sitecore.Kernel and Sitecore.Mvc. Make sure you choose the correct version of Sitecore for each package before you install them (I’m using 8.2.180406). I also like to choose the .NoReferences versions of these packets, just to streamline development.
Next, highlight all of your references in the project. In properties, set “Copy Local” to false. Doing so will prevent your production .dlls from being overwritten and potentially breaking the site.
Making a View Rendering
For this example we’re going to create a simple view rendering, as the intricacies of MVC are outside the scope of this post. Make a new folder under the “Views” folder in your BasicContent project, then right-click it and add a view. In the window that comes up, name the view “Index,” set the Template to “Empty (without model)” since we’re going to specify a model that isn’t in this project, and check “Create as a partial view,” so you don’t get any of the extra Visual studio template info.

When you create a view, there will be some new junk added to your project that you can delete: A Content folder containing css, a Fonts folder, a Scripts folder, a folder in your Views folder called “Shared” that contains a layout, and a view called _ViewStart, also in your Views folder. Delete it all. Don’t even worry about it.
You will now have a view called Index.cshtml. This is good. Since we’re not getting too into MVC in this post, go ahead and just copy the following code into your view:
@model Sitecore.Mvc.Presentation.RenderingModel
@using Sitecore.Mvc

<div class="content">
    <p class="image-wrapper">
        @Html.Sitecore().Field("image")
    </p>
    <h2>@Html.Sitecore().Field("title")</h2>
    <p class="body">
        @Html.Sitecore().Field("body")
    </p>
</div>
Next, in Sitecore, we’re going to create the corresponding Sitecore Template and View Rendering. Your template is the data model which your Sitecore items will instantiate, and your Rendering is a reference to the code you’re writing in Visual Studio that brings that data to the page.
In the content tree, navigate to Templates. According to Helix convention, there should be folders for Foundation, Feature, and Project under Templates, as well as in a few other places. This organization helps you keep track of your separate modules, but doesn’t affect code. Go ahead and add those three Template Folders under “Templates” now. You can even add unique icons to these folders to make finding them faster, if that helps you. Now right-click your new “Feature” folder and add a new Template Folder, calling it “Basic Content”. Then, right-click that folder and create a new template, calling it “Basic Content” as well. Add a new section (call it whatever), and add three fields: “Title”, of type Single-Line Text, “Body”, of type Rich Text, and “Image”, of type Image.

Next, let’s go ahead and make that View Rendering item. In the content tree, Navigate to Sitecore\Layouts\Renderings. Create three Rendering Folders in here, naming them Foundation, Feature, and Project. Under Feature, create a Rendering Folder called “BasicContent”. In that folder, create a new View Rendering called BasicContent. In the new Rendering item, you’re only going to add to the “Path” field. Add the following line: /Views/BasicContent/Index.cshtml. This path references the views folder in the file structure of your Sitecore instance (mine is at C:\inetpub\wwwroot\TGBlog\Website\). If you navigate to that Views folder right now, you’ll notice that your view isn’t in it. What gives? It’s actually in your Visual Studio solution repo folder (for me, C:\Repos\TGBlog\src\Feature\BasicContent\code\Views\BasicContent). Right now, the View Rendering item in Sitecore references a file that isn’t there. We still need to set up Visual Studio to publish to the Sitecore directory. Before we do that, however, we have a few more steps to do…
Creating the Website Project and Main Layout
To adequately show you the idea behind Helix, we’re going to make another project in our Visual Studio solution now, this time under the Project layer. The Project layer is the tip of our Sitecore Helix pyramid, building upon the Foundation and Feature layers. The code that lives in the Project layer depends heavily on the modules in the other two layers. In this layer, you create your websites. And that’s exactly what we’re going to do.
In our Visual Studio solution, right-click the Project folder and add a new Solution Folder. In keeping with the theme, we’re going to call this one “Website”. Right-click this folder, then create a new project, following the same steps you followed above to create and set up the BasicContent project. I’ll sit here and wait.
Okay, done? Good deal. You should now have a project in the “Website” folder under your Project folder called [SolutionName].Project.Website. Delete the necessary folders and files, set the web.config properties correctly, add the NuGet packages, and do everything else outlined in the “Making a Module in Helix” section above. Then, create a new “Layouts” folder under “Views”. Right-click this and add a new view - this will be our main layout. (However, make sure you’re not using the default ASP.NET layout, as this will add unnecessary elements to your page. Either uncheck the “layout” box when clicking Add->View, or simply add an MVC 5 View Page.) Call it “MainLayout”.

We’re not going to put anything fancy into this layout view. We’re simply going to add a reference to Sitecore MVC, and insert a placeholder for our content into the body. Like so:
@using Sitecore.Mvc
@{
    Layout = null;
}

<!DOCTYPE html>

<html>
<head>
    <meta name="viewport" content="width=device-width" />
    <title></title>
</head>
<body>
    <div>
        @Html.Sitecore().Placeholder("main")
    </div>
</body>
</html>
This should be everything you need for the layout on the code side. In Sitecore, let’s make the corresponding Layout item. Navigate to layout/Layouts in the Sitecore tree, and underneath that create three Layout Folders corresponding to the three Helix layers: Foundation, Feature, Project. In the Project folder, make a folder called Website, and in that folder, make a new Layout. You’ll want to just copy the Sample Layout because creating a new Layout in Sitecore makes you create a layout file in the file structure, and we’ve already done that. So copy the Sample Layout to the Layouts/Project/Website folder, rename it “MainLayout”, and set the path to “/Views/Layouts/MainLayout.cshtml”.
Publishing The Projects
If you’re familiar with the Habitat project, you know that it utilizes Gulp.js to publish all of the projects within its Helix solution. While that’s useful to know how to do, we’re going to save that for a later post. For now, we’re going to take a slightly easier route, so we can see our changes in action immediately.
The first thing you’re going to want to do is back up the Sitecore instance in your web root. We haven’t made any changes to that just yet, and mistakes during this step can mean having to re-download Sitecore and replace your .dlls. Plus, there’s the old programmer adage of “if it doesn’t exist in at least two places, it doesn’t exist.” So go ahead and copy your Sitecore instance.
We’re going to publish these projects, YourSite.Project.Website and YourSite.Feature.BasicContent, individually. The first thing you’ll want to do is go through their respective references and, in their properties, set “Copy Local” for each one to FALSE. This will prevent you from over-writing the .dlls in the web root and breaking your site. In the future you may end up writing more complex modules that require references not yet included in your web root, but what we’re doing right now is pretty basic, so don’t worry about that yet.
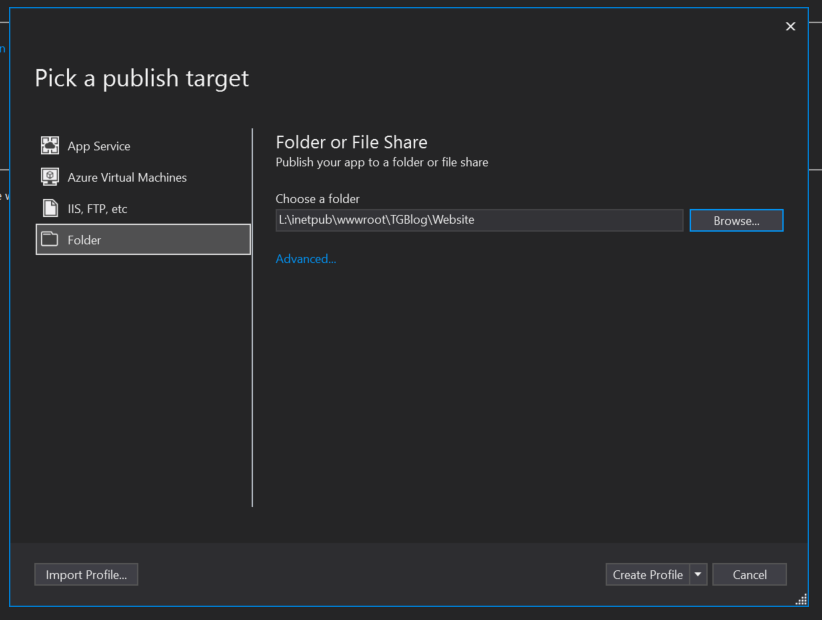
After preventing your references from being published, right-click the YourSite.Project.Website project and click “publish”. Now we’re going to create a publish profile and point it at the web root. In the “Pick a publish target” box that pops up, choose “Folder” then browse to the \Website folder in your web root. Both of your projects are going to publish here.
Feel free to rename your publish profile to something more descriptive. When you’re ready, simply press the “Publish” button. You should now be able to see MainLayout.cshtml in the \Website\Views\Layouts folder of your file structure! Go ahead and do the same thing for Yoursite.Feature.BasicContent, creating a new publish profile that points to your web root, then publishing. In your \Website\Views folder, you should see a BasicContent folder with an Index.cshtml file inside. Now the rendering and layout items we created in Sitecore are actually pointing to something! The only thing left to do is put it all together.
Putting it all Together
With the Home node selected, open the Presentation tab and in the “Layout” section, click Details. This is the Layout Details window, where you build how your pages actually look (if you’re not using the Experience Editor, which you should be, and which we’ll cover in future posts). In the Default configuration, click Edit. You’ll be brought to the Device Editor window, where you can select your Layout and Controls. For the Layout, select Layouts/Project/Website/MainLayout. In the Controls tab, remove everything currently there, then click the Add button and select Renderings/Feature/BasicContent/BasicContent. In the “Add to Placeholder” text box, type “main”, which is the single placeholder we’ve set up in our Layout. Also go ahead and check that “Open the Properties dialog box immediately” box before you click the Select button.

When you click Select, a “Control Properties” window should come up. Here we’re going to specify the datasource of our view rendering, so Sitecore knows what data it should be displaying on the page. In the Data Source field, click Browse and select the Basic Content item we set up directly below the Home node. Click Okay on all the windows until they’re gone.
The last thing to do is enjoy our new web page! In the content editor, click the Publish tab, then click “Experience Editor.” A new window should pop up with your shiny new web page, displaying the three fields you’ve populated with data. From the experience editor you can even edit these fields, changing the text and selected image to your liking. To see the final, uneditable version of your site, you can click “Preview” from the Publish tab in the content editor, or Other > Preview from the Experience Editor.

To Be Continued...
Now that you've created a Helix solution from scratch, you're ready to develop for Sitecore with best practices! In future blog posts, I intend to build on this one, incorporating and expanding on things like Sitecore Rocks, MVC, styling, the Experience Editor, serialization, Gulp.js, and plenty more. If you have any comments, problems, or suggestions, please feel free to leave them in the comments or contact us. At TechGuilds we pride ourselves on being Sitecore experts and a pillar in the Sitecore community.