In the previous post we created a Sitecore form with all the fields and placed it on the page. However, the form didn’t look very good and it actually didn’t do anything.
Let’s add some styling and some basic actions to our form so we can begin collecting registrations for the Spicy Hot Webinar! Upon submitting the form, we’ll want to send the visitor a confirmation e-mail, display a message and hide the form.
Modify and Style Our Sitecore Form
Styling a form requires that you already have and know the CSS classes you want to use. These would have been set up as part of your website implementation and style guide. Let’s open our form and add some style.
- Log into Sitecore and open the Forms tool.
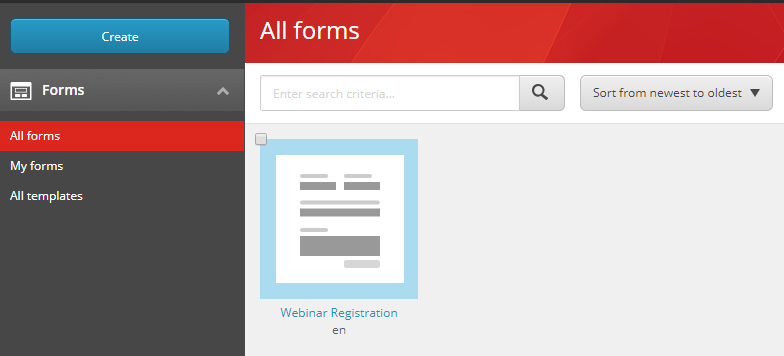
- Click the name of the form to open it in the editor.
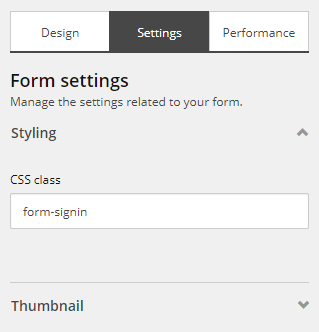
- First lets add a CSS class to the form itself. Click on the Settings tab in the Form Elements panel on the right and add the class as shown. Click Apply and click Save to keep your changes.
- Next, click on each of the remaining fields, scroll down to the Styling section and add the CSS classes as follows. Be sure to click Apply and Save after each field change.
- Lastly, click on the Register Today! button and add the following classes to the Styling section.


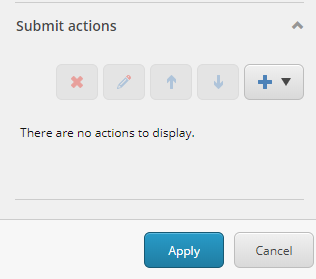
Since we’re already configuring the Register Today! (submit) button, we might as well add some Submit Actions to make the form work.
Adding Sitecore Form Submit Actions
When a visitor clicks “Register Today!” to submit our form, we want to…
- Save the data to the database
- Send a confirmation e-mail
- Display a Thank You page
Tip: By displaying a Thank You page, the visitor has a clear indication that their submission was successful and you can also trigger goals and outcomes related to your campaign and drive further engagement with personalized content. However, that’s a topic for another post.
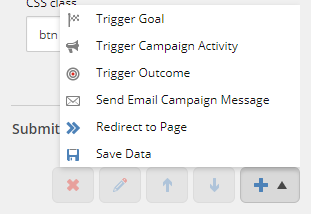
- With the button selected, in the right panel, click the Plus icon to display a list of Submit Actions.
- Choose the Save Data option to add the action.
- Click the Plus sign again and add the Send Email Campaign Message. In the dialogue box that appears, choose the Subscription Confirmation message. Note that this is an out-of-the-box message, and we probably would have created our own in the real world, but for the sake of the demo I’m using this "canned" message.
- Click OK to accept the selection.
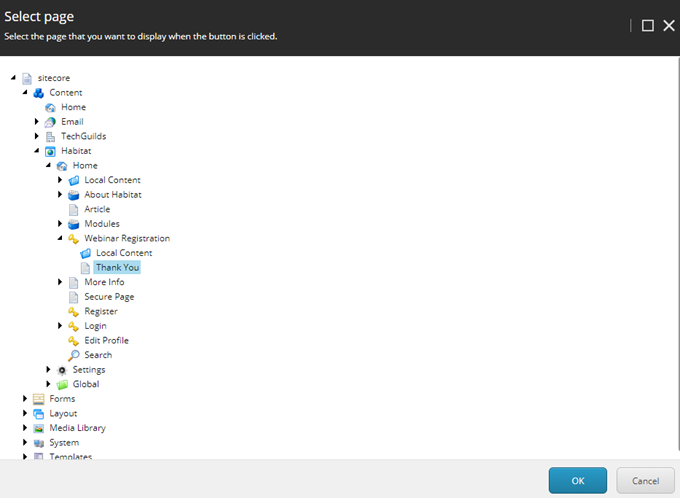
- Finally, click the Plus sign one more time and choose Redirect to Page. I created a “Thank You” page under the Webinar Registration item while you were completing the steps above. Create a page if necessary or select any other page from the dialogue box and click OK. You can always come back and choose another page later.
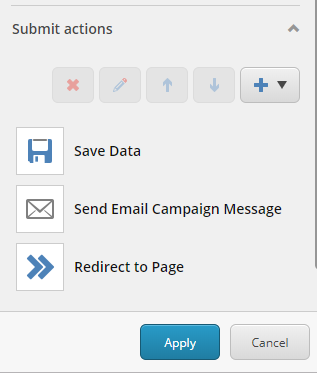
- Your list of actions should now look like this. Note that the actions will trigger in the order that they appear.
- Click Apply and then save and publish your changes.

Now that our form is ready to take in registrations, we can also enhance the customer experience by adding personalization when they complete the registration or when they return to the website and haven’t yet registered. However, we’ll first need to create the goals that we’ll use to trigger the personalisations.
Up next…Creating and Triggering Goals Based on Visitor Engagement
Previously...Creating and Adding a Sitecore Form to a Landing Page