
Sitecore Rocks, a plugin for Visual Studio, is a highly versatile tool to help make Sitecore development more efficient. It lets developers access the entire content tree through Visual Studio, and it also gives the developer access to processes that tie the back end and front end together. For example, creating a new rendering using Sitecore Rocks will create both a rendering item in Sitecore as well as a .CSHTML view file in your Visual Studio solution. Rocks is also useful for creating a Templates.cs file, which helps standardize references to Sitecore Items and Fields. With this file you don’t have to worry about copying and pasting GUIDS to reference items and fields.
INSTALLING ROCKS
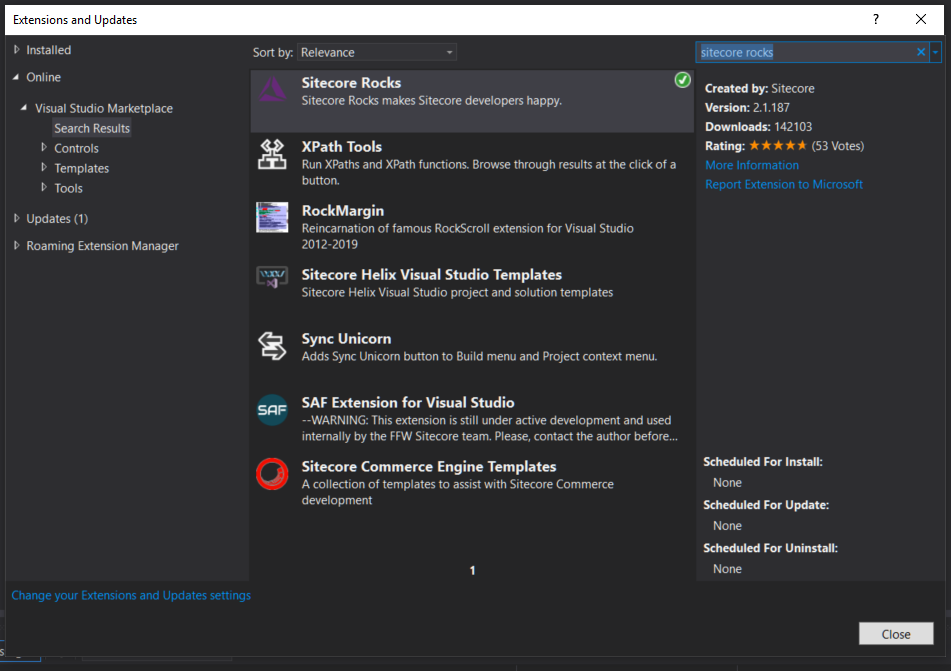
Install Sitecore Rocks through Visual Studio’s “Extensions and Updates” window.
Once installed, Sitecore Rocks is ready to be connected to your Sitecore instance. Fortunately for us, Sitecore themselves have very useful documentation on connecting Rocks.
Once you have Sitecore Rocks connected, we can have fun with it.
USING ROCKS
One of the main advantages to using Sitecore Rocks is that it eliminates the need for most uses of the Content Editor. You can access the entire content tree from a window in Visual Studio.
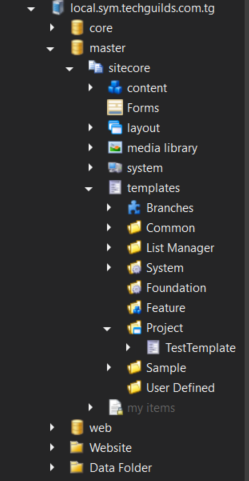
From this Sitecore Explorer pane, you can do many of the things you need to do in Sitecore as a developer: create new templates and standard values items for those templates, link rendering items to views and controllers, and create content. However, while the Sitecore Explorer pane replaces the Content Editor, it doesn’t act as a stand-in for the Experience Editor, which you’ll still may want to use to build and preview your pages.
TEMPLATES.CS
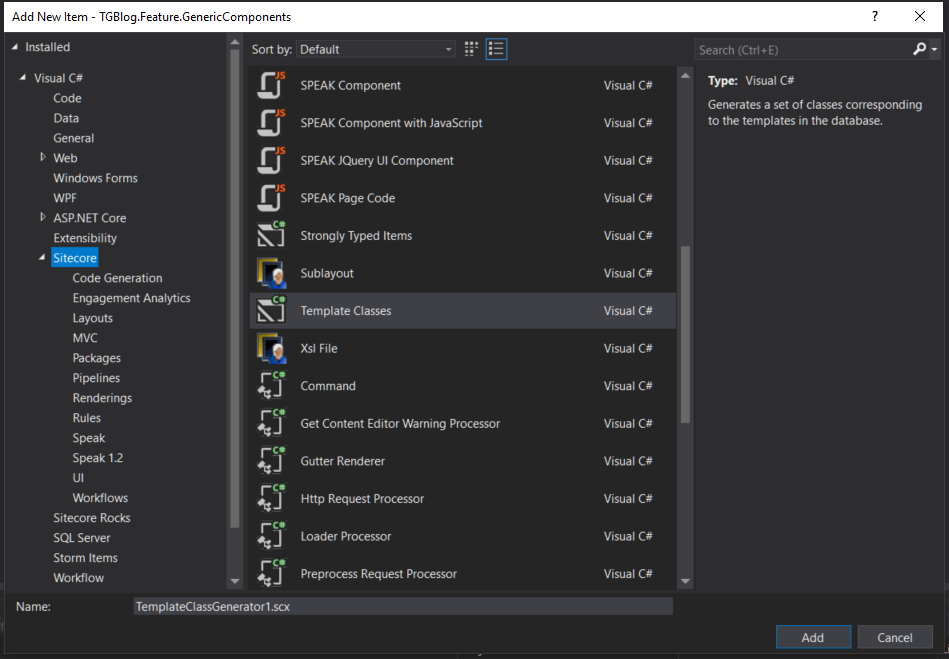
We’re going to use Sitecore Rocks to generate a Template class that we can reference in the back-end instead of having to copy and paste individual GUIDS from Sitecore items. To do this, right-click a project and select Add -> New Item. In the “Add New Item” window, under the “Sitecore” section, you’ll select “Template Classes.” Name this Templates.scx.
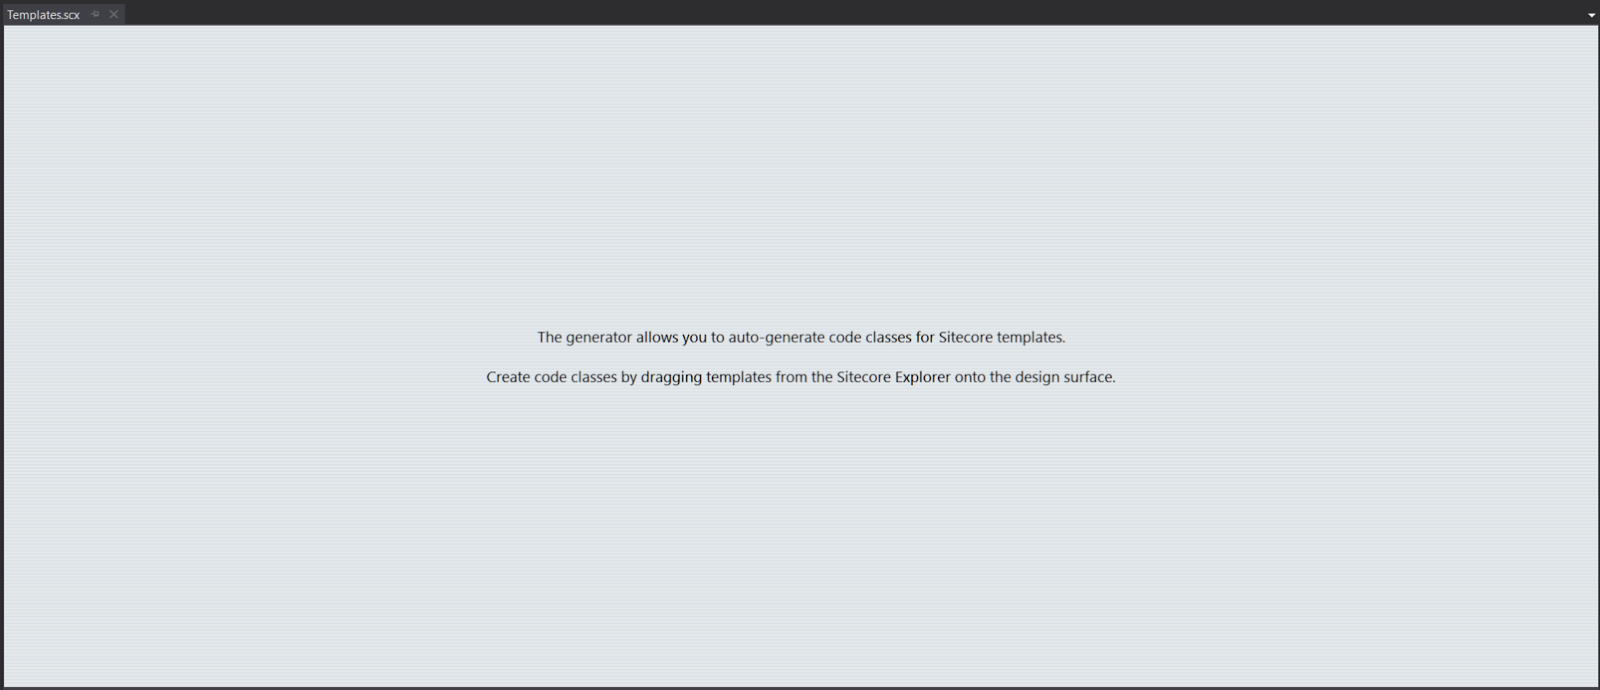
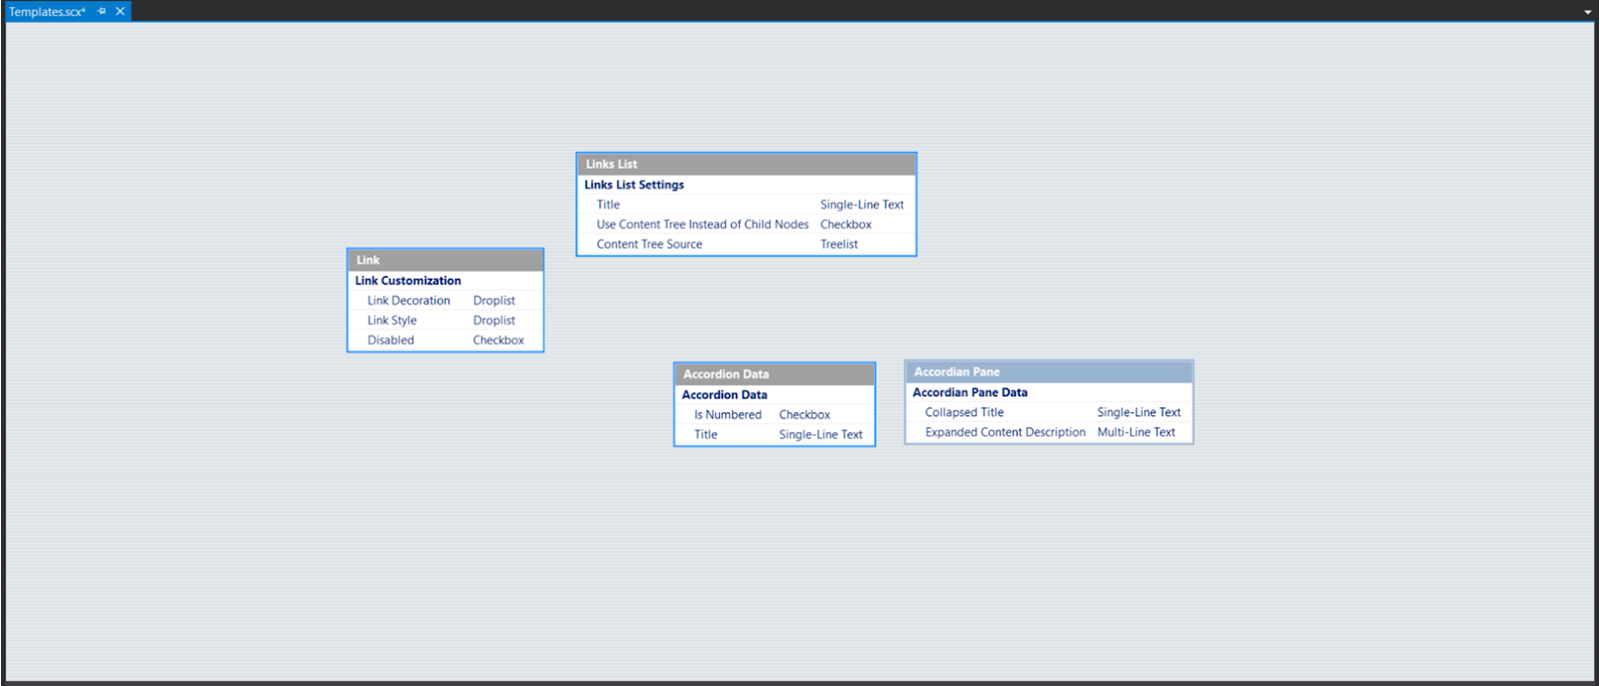
In the new tab that pops up, you should see a blank white/grey screen with some text in the center. In this screen, you can drag and drop items from Sitecore Rocks. Ideally, you’ll only drop Template items.
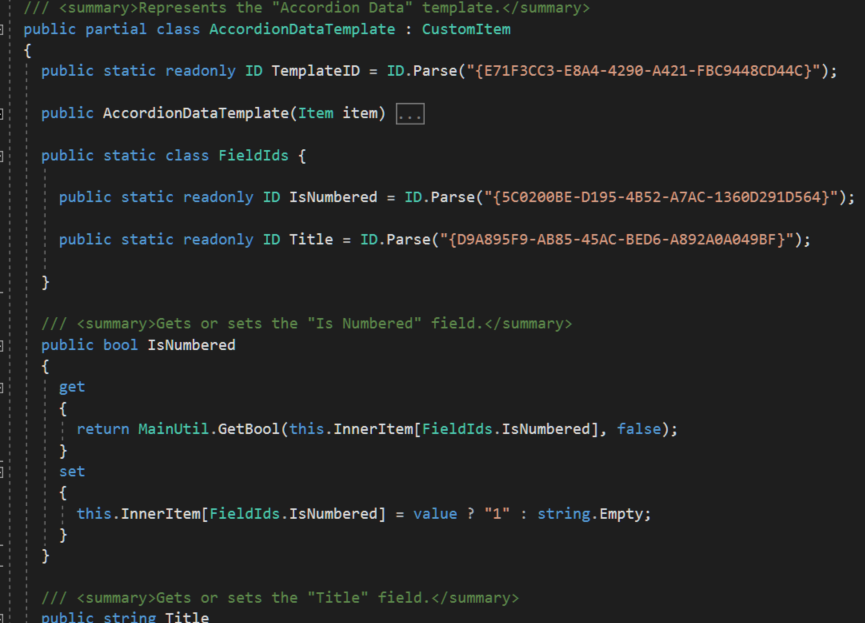
Save this file and there will be a new .Designer.cs file underneath it, containing the generated code.

Not only does this generated template file give you quick access to Template and Field GUIDs, but it also creates properties to access those fields.
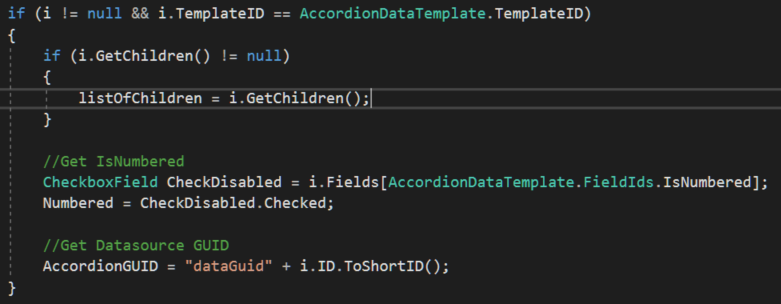
Now in our controller code we can easily access Template and Field IDs, like so:
Having a Templates.cs file is incredibly useful. Good Sitecore devs know to reference items and fields through the use of GUIDS instead of names, and good developers in general know they shouldn’t write the same code twice. Sitecore Rocks’ templates.cs feature solves both of these problems by creating classes by which devs can refer to GUIDS without copying and pasting.
Sitecore Rocks has many other features, which I encourage you to explore, as mastering it will make you a more agile developer.