

In a previous post, we had a quick walkthrough of Sitecore Marketing Automation. Now that we’re familiar with the interface, let’s create a simple campaign. We’ll go over the process step by step using the following scenario:
Scenario
We have a blog post with top-of-funnel content (content that doesn’t try to sell the reader on a product or service, but instead educates, helps, and answers common questions or pain points). At the end of the post, there’s a call to action to download an e-book that dives deeper into the topic. The user must submit a form to get the e-book. Once a user downloads the e-book, we want to send them a thank you email ( _email A_). We then want to wait for a couple of days and send them another email with a link to a case study related to the topic featuring a product/service that we offer ( _email B_). We believe that those contacts who view the case study are qualified and likely farther down the buying process, so we want to hand them over to Sales. For those who don’t view the case study, we want to send them a reminder email to do so ( _email C_). If they don’t open that one, we will assume they are not interested at this time, and we’ll let them know that we won’t be bothering them with further communication and that we’ll be happy to help them once they are ready ( _email D_).
Prerequisites
To create the campaign based on the scenario above, we need to have the following set up:
- A Sitecore form that:
- A case study associated with a goal ( _goal B_) that is triggered when the case study is viewed
- Automated email campaigns (emails A through D outlined in the scenario above)
How to create a marketing automation campaign in Sitecore step-by-step
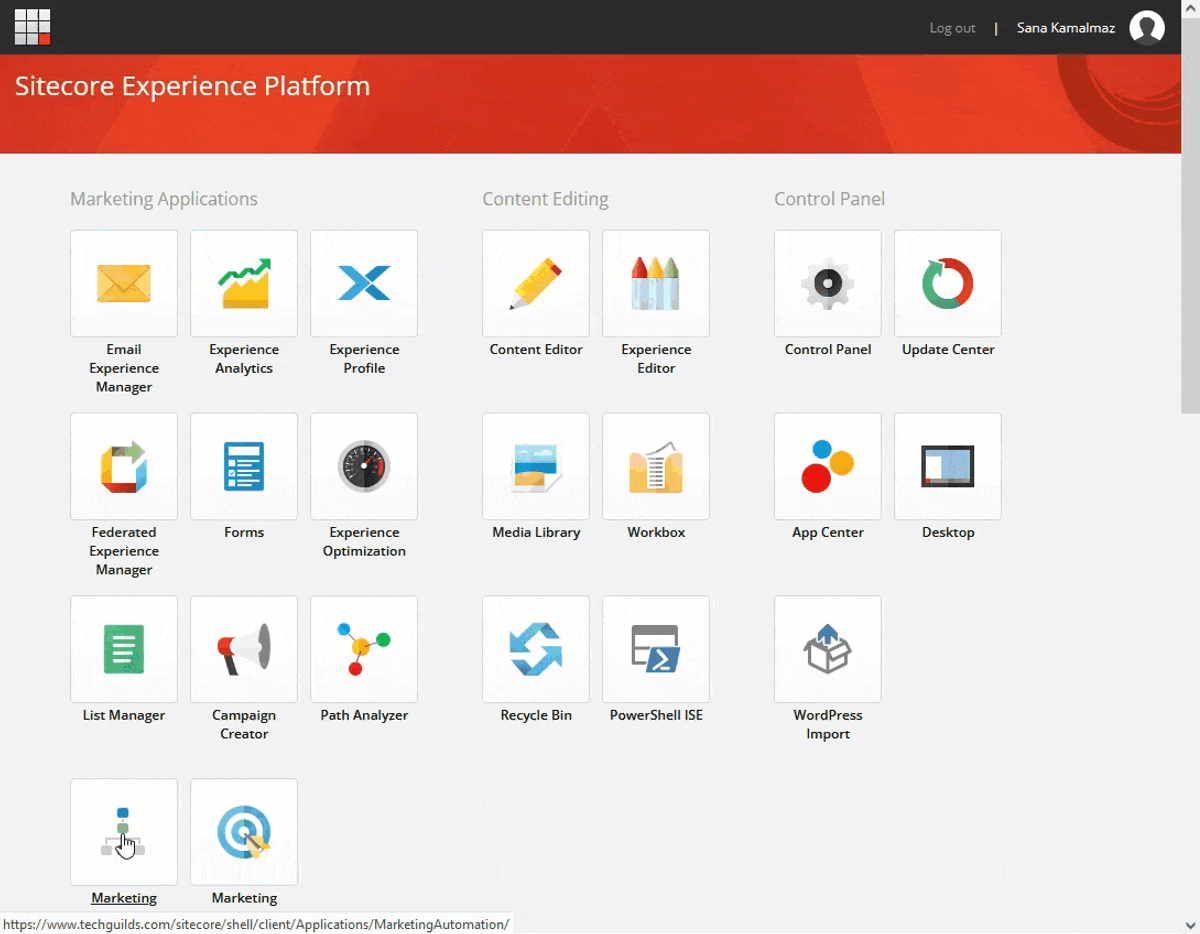
- In Sitecore Launchpad, under Marketing Applications, go to Marketing Automation. Once in the Marketing Automation application, click the blue _Create_ button at the top left corner of the page
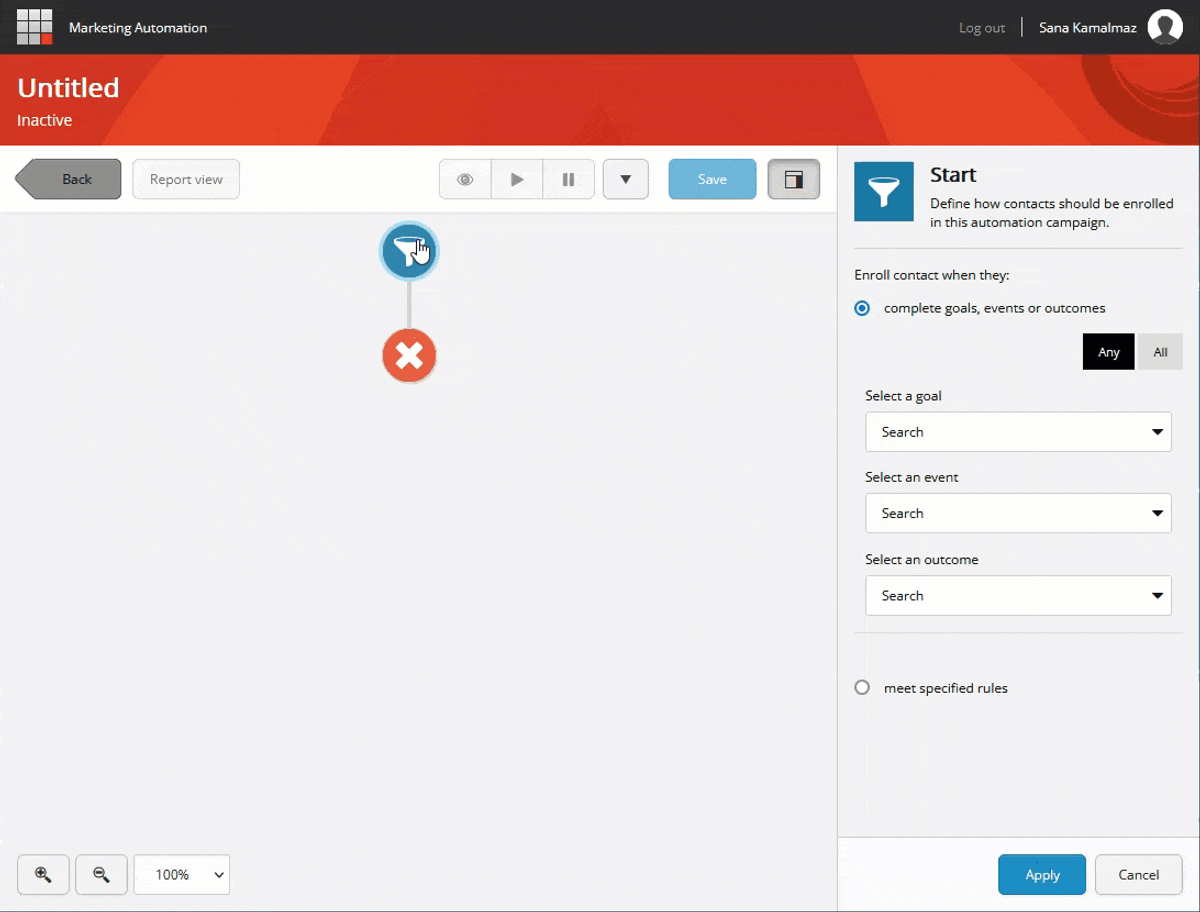
- To set up how contacts get enrolled in the campaign, click the start element (the blue funnel icon at the top of the canvas) to configure it. The element settings pane will appear on the right. In our scenario, we want to enroll those contacts who download the e-book. Our e-book lead generation form is set up to trigger _goal A_ when submitted. Therefore, in the element settings pane, we’ll keep the setting to enroll contacts when they complete goals, events or outcomes selected, and in the _Select a goal_ drop down menu, we’ll select _goal A_ (ours is named _Downloaded ebook_). We’ll make sure to keep the choice _Any_ selected. The _All_ choice can be used when we need the contacts to fulfill multiple criteria to enroll
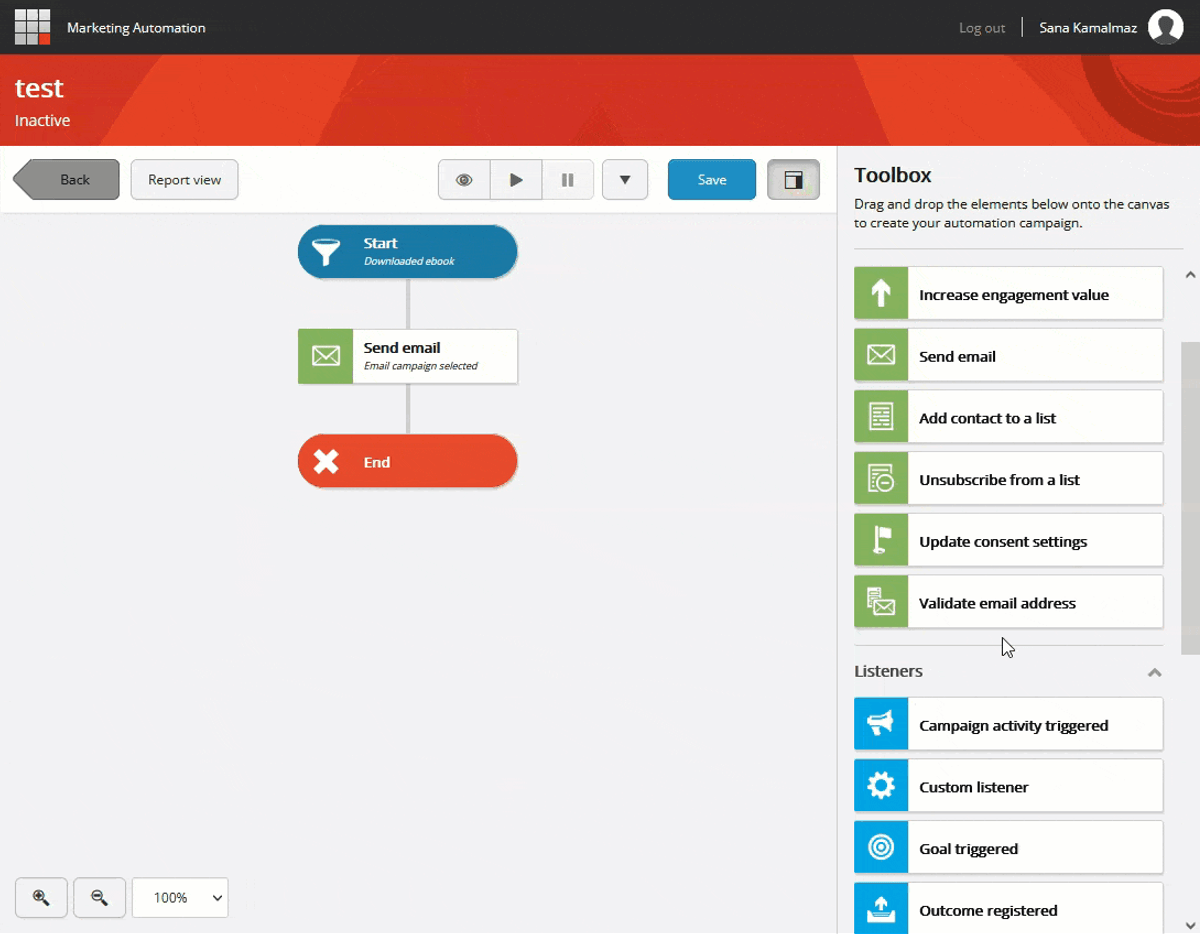
- To configure the campaign to send a thank you email to the contacts who downloaded the e-book, in the _Toolbox_, under _Marketing actions_, drag the _Send email_ action and drop it right after the start element. Once there, click it to bring up the tool settings pane and select the relevant email campaign ( _email A_) and click _Apply_
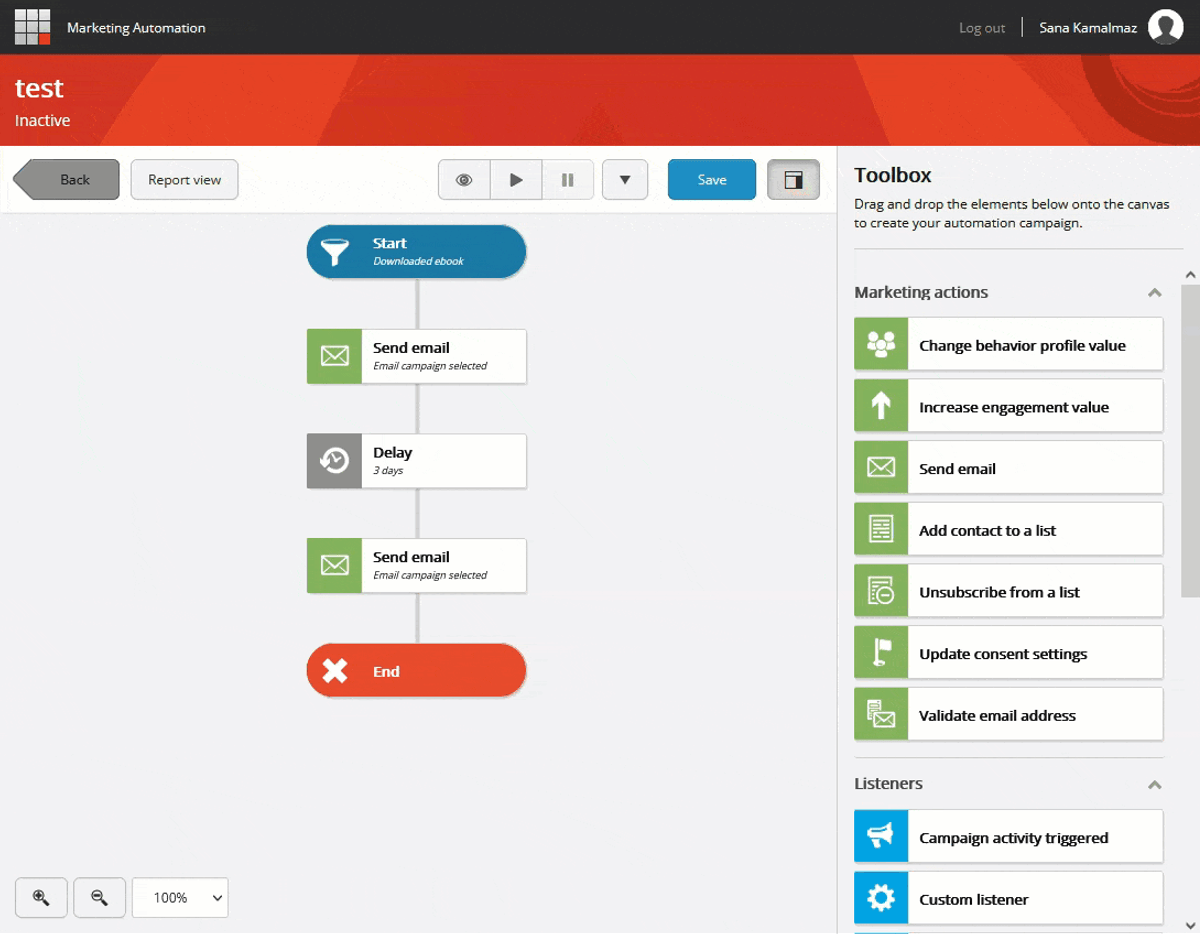
_!Sitecore Marketing Automation - send email element_ 04. We want to wait before we send _email B_. To do that, drag the _Delay_ element from the _Other elements_ group and drop it right after _email A_. Once there, click it and set the delay time. We’ll wait for 3 days here, depending on the scenario you might want to choose something else. There’s also the option to wait until a specific date and time
- To send an email with a link to the case study, drag the _Send email_ action and drop it right after the delay. Click it and select the relevant email campaign ( _email B_) and click _Apply_
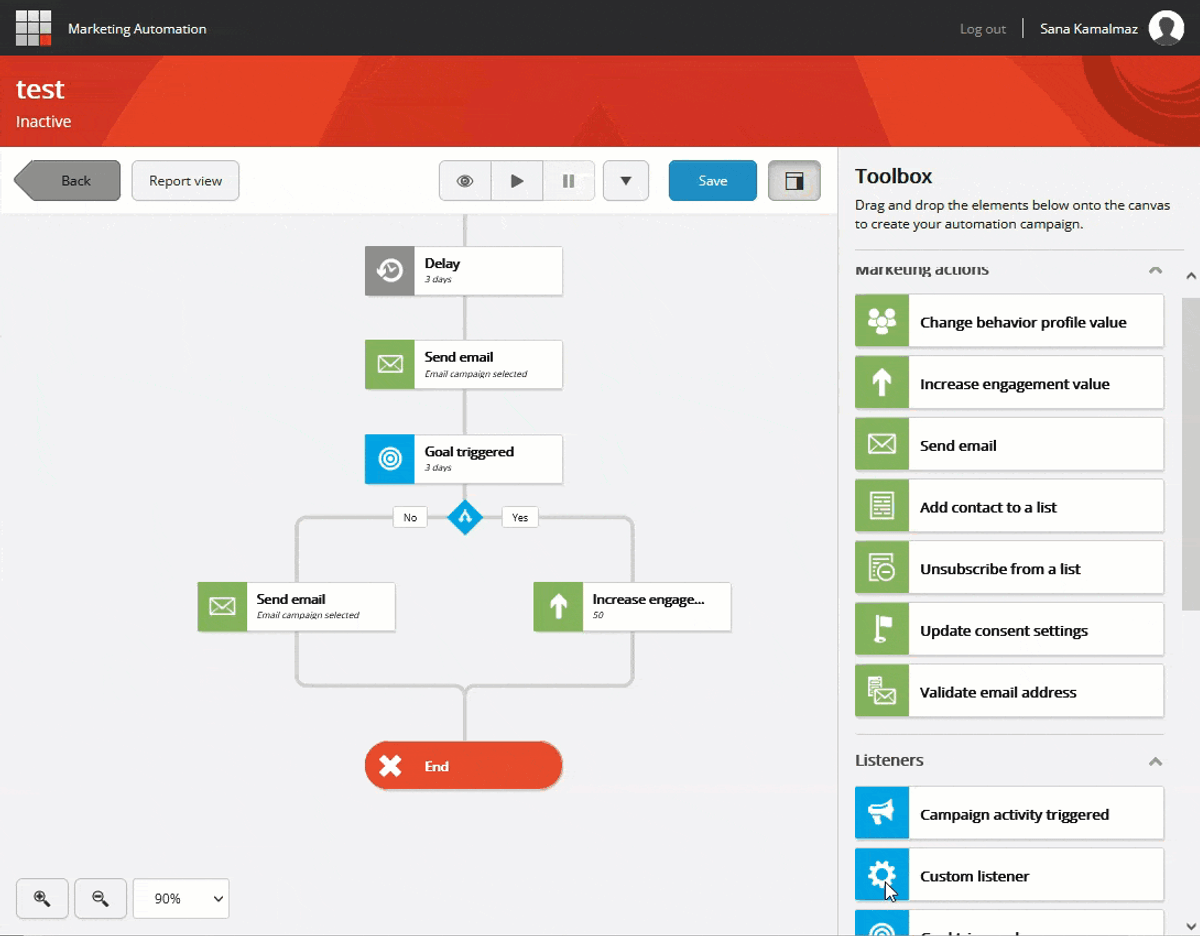
_!Sitecore Marketing Automation - send email element_ 06. We want to wait and see which contacts engage with the case study. To do that, from the _Listeners_ group, drag the _Goal triggered_ element and drop it after _email B_. Once there, click it and select _goal B._ Then, under _Listen for,_ enter 3 days. What this does is wait and listen for three days. Within that time, when a contact triggers _goal B_, they move down the _Yes_ path. At the end of the three days, contacts who didn’t trigger _goal B_ move down the _No_ path
- Handing over those contacts who triggered _goal B_ to sales depends on your internal processes. You can create a custom action to update the contact in your CRM with the help of your Sitecore partner or team of developers. Here, we’ll increase the engagement value for them by 50, assuming there’s a process that hands over contacts with 50+ engagement value to Sales. To do that, drag the _Increase engagement value_ action (under _Marketing actions_) and drop it in the _Yes_ path. Click it, enter 50, and click _Apply_
_!Sitecore Marketing Automation - increase engagment value_ 08. For those who don’t view the case study, we want to send them a reminder. To do that, drag the _Send email_ action and drop it right after _No_. Click it, select _email C_, and click _Apply_
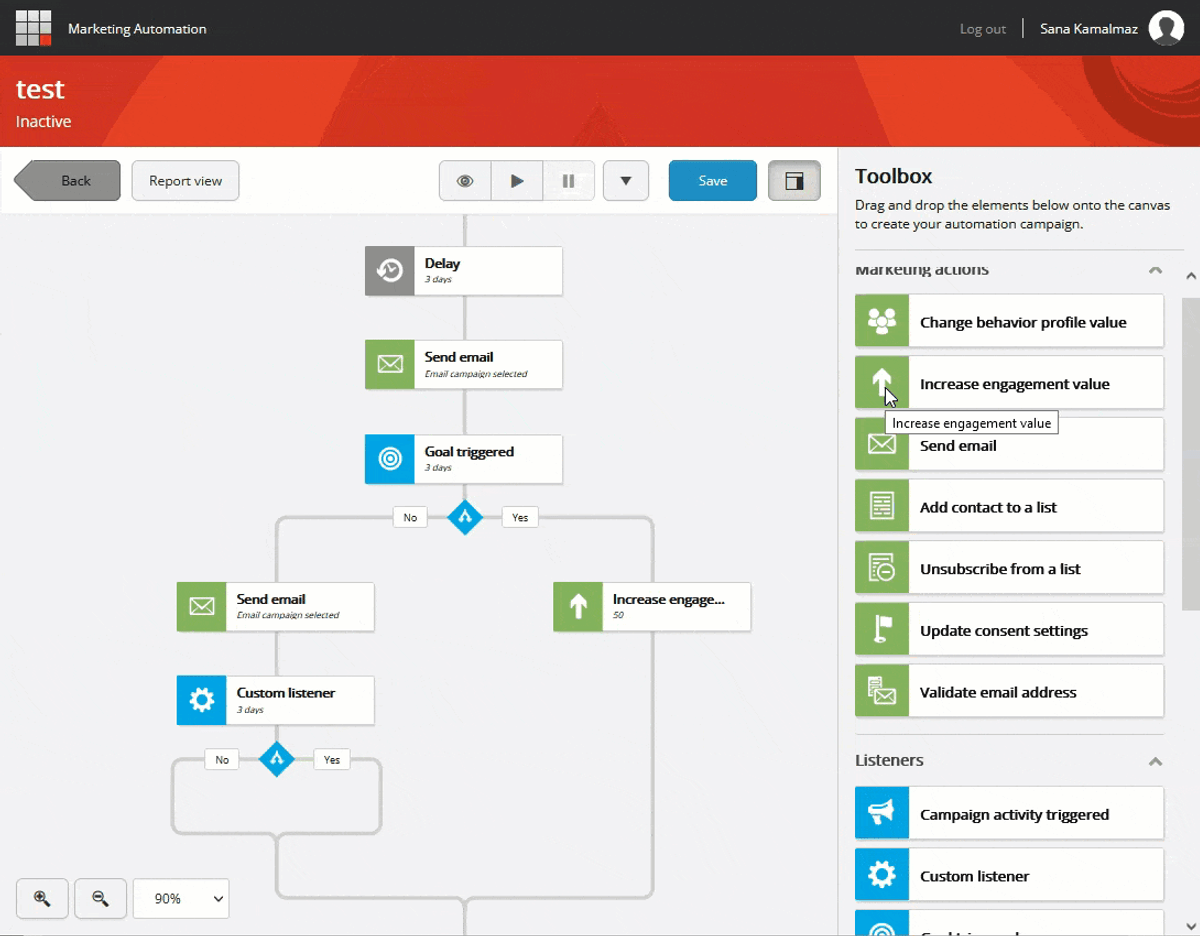
_!Sitecore Marketing Automation - send email element_ 09. To listen and see who opens the reminder email, drag the _Custom listener_ (under the _listeners_ group) and drop it after _email C_. Click it, click _Edit in rule set editor_, search for _open_, and select _where the contact opened email email_. In the _Edit rule_ below, click _email_ and select _email C_. Set it to listen for 3 days
- Drag the _Increase engagement value_ action and drop it in the _Yes_ path. Click it, enter 50, and click _Apply_. This will increase the engagement value of contacts who viewed the case study after being reminded so they can be handed over to Sales
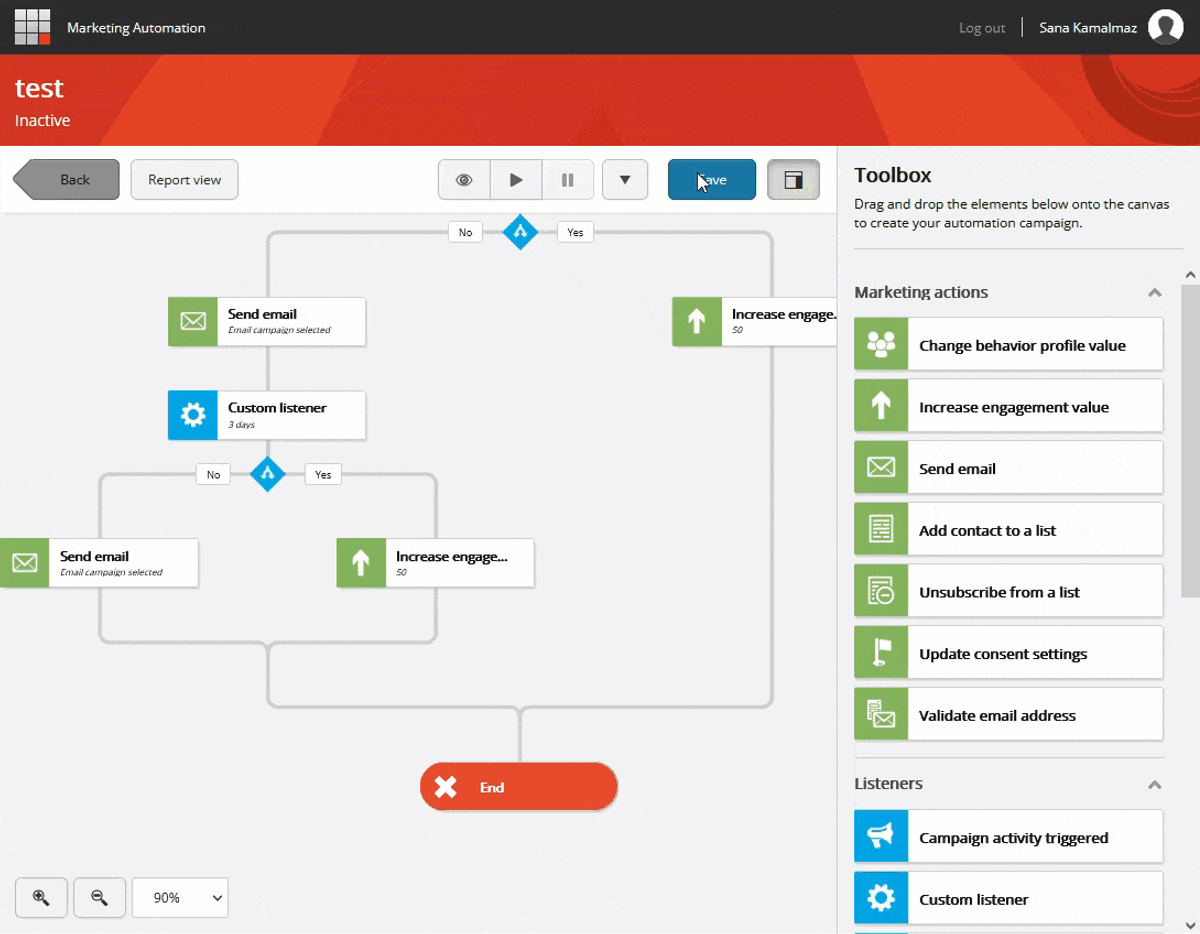
- For those who don’t open the reminder email, let’s send them one final note and take them out of the campaign. To do that, drag the _Send email_ action and drop it right after _No_. Click it, select _email D_, and click _Apply_
_!Sitecore Marketing Automation - send email element_ 12. Finally, click the blue _Save_ button to save the campaign, enter a name, description (optional but recommended) and start and end dates, and hit save 13. To activate the campaign, click the play icon at the top and confirm
And there it is, a step-by-step guide to creating a very simple marketing automation campaign in Sitecore. A few things to note before we wrap up though…
Things to note
- It is easier to design your campaign in a flowchart or mind map tool (or even a paper) first and then create the campaign in Sitecore
- It is also more efficient to create all the marketing elements that you’ll need in the campaign like goals, forms, email campaigns, CTAs, etc. beforehand. That way, you won’t have to toggle between Sitecore Marketing Automation and other applications as you create your campaign
- The scenario outlined here is a very simple one. You can create campaigns that are tailored to your brand’s needs. Of course, the more complex and tailored the campaign is, the more likely that you’ll need to involve your Sitecore partner or dev team, but the efforts are usually worth it!
In this series